Tutorial: Snapshot and Restore
editTutorial: Snapshot and Restore
editReady to try Snapshot and Restore? In this tutorial, you’ll learn to:
- Register a repository
- Add snapshots to the repository
- Create a snapshot lifecycle policy
- Restore a snapshot
Before you begin
editThis example shows you how to register a shared file system repository and store snapshots.
Before you begin, you must first mount the file system to the same location on
all master and data nodes. Then add the file system’s path or parent directory
to the
path.repo
setting in elasticsearch.yml for each master and data node.
Register a repository
editUse Snapshot and Restore to register the repository where your snapshots will live.
- Open the main menu, then click Stack Management > Snapshot and Restore.
- Click Register a repository in either the introductory message or Repository view.
-
Enter a name for your repository, for example,
my_backup. -
Select Shared file system.
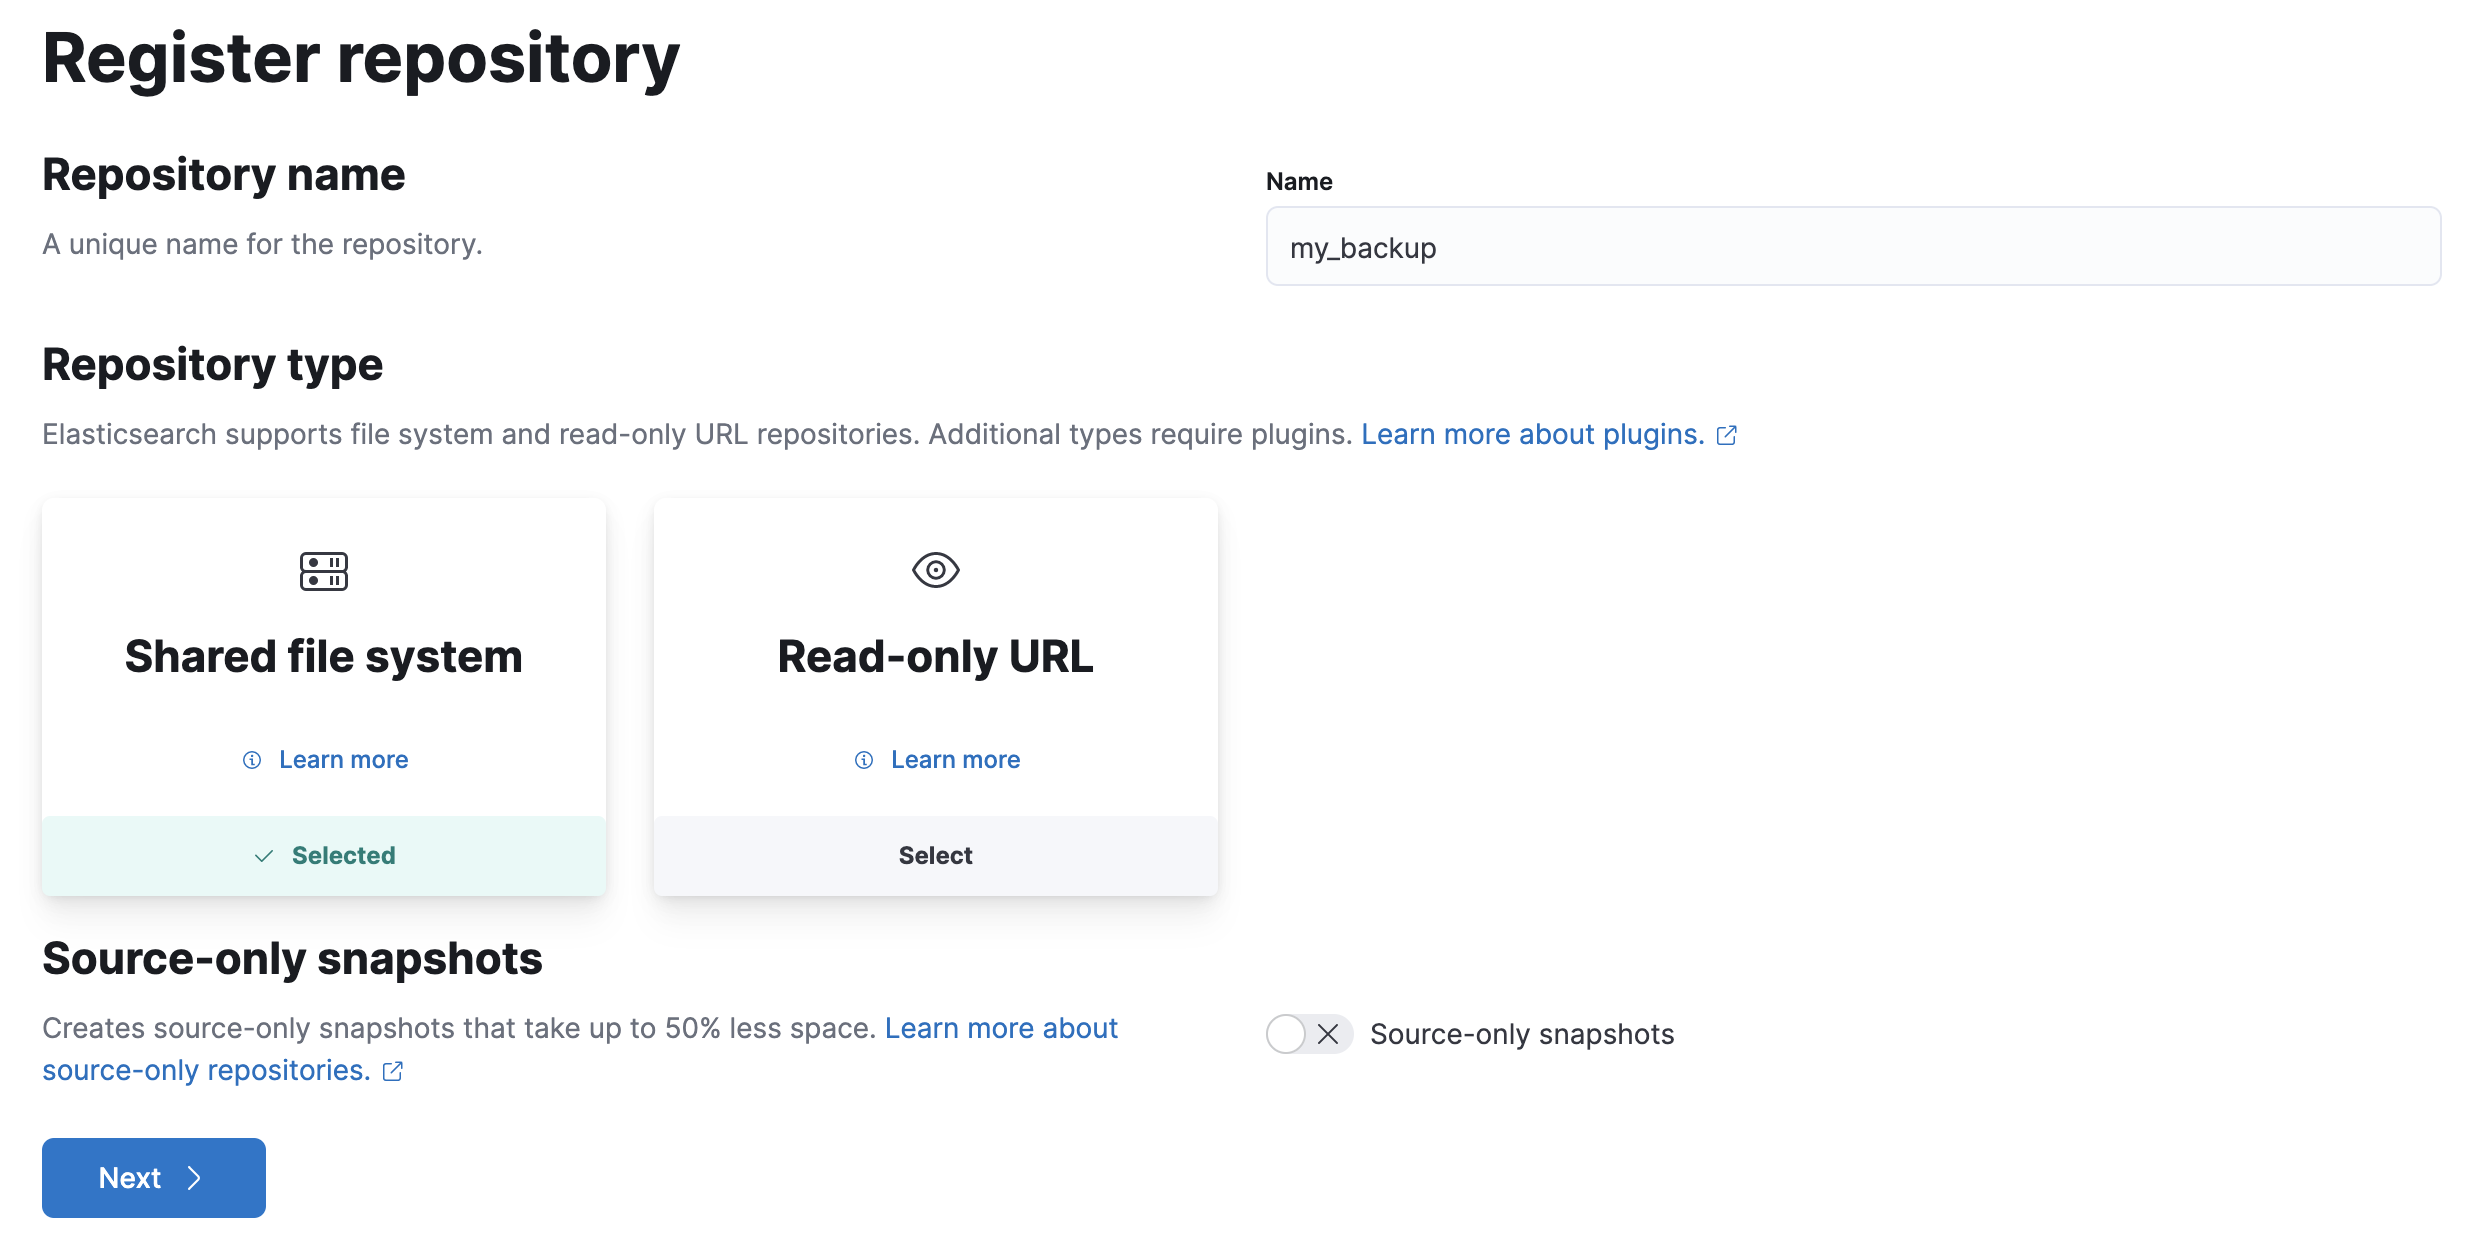
- Click Next.
-
In File system location, enter the path to the snapshot repository,
/tmp/es-backups. -
In Chunk size, enter
100mbso that snapshot files are not bigger than that size. -
Use the defaults for all other fields, and then click Register.
Your new repository is listed on the Repositories view. The repository currently doesn’t have any snapshots.
Add a snapshot to the repository
editUse the snapshot API to create a snapshot.
- Open the main menu, click Dev Tools, then select Console.
-
Create the snapshot:
PUT /_snapshot/my_backup/2099-04-25_snapshot?wait_for_completion=true
In this example, the snapshot name is
2099-04-25_snapshot. You can also use date math expression for the snapshot name. -
Return to Snapshot and Restore.
Your new snapshot is available in the Snapshots view.
Create a snapshot lifecycle policy
editNow you’ll automate the creation and deletion of snapshots using the repository created in the previous example.
- Open the Policies view.
-
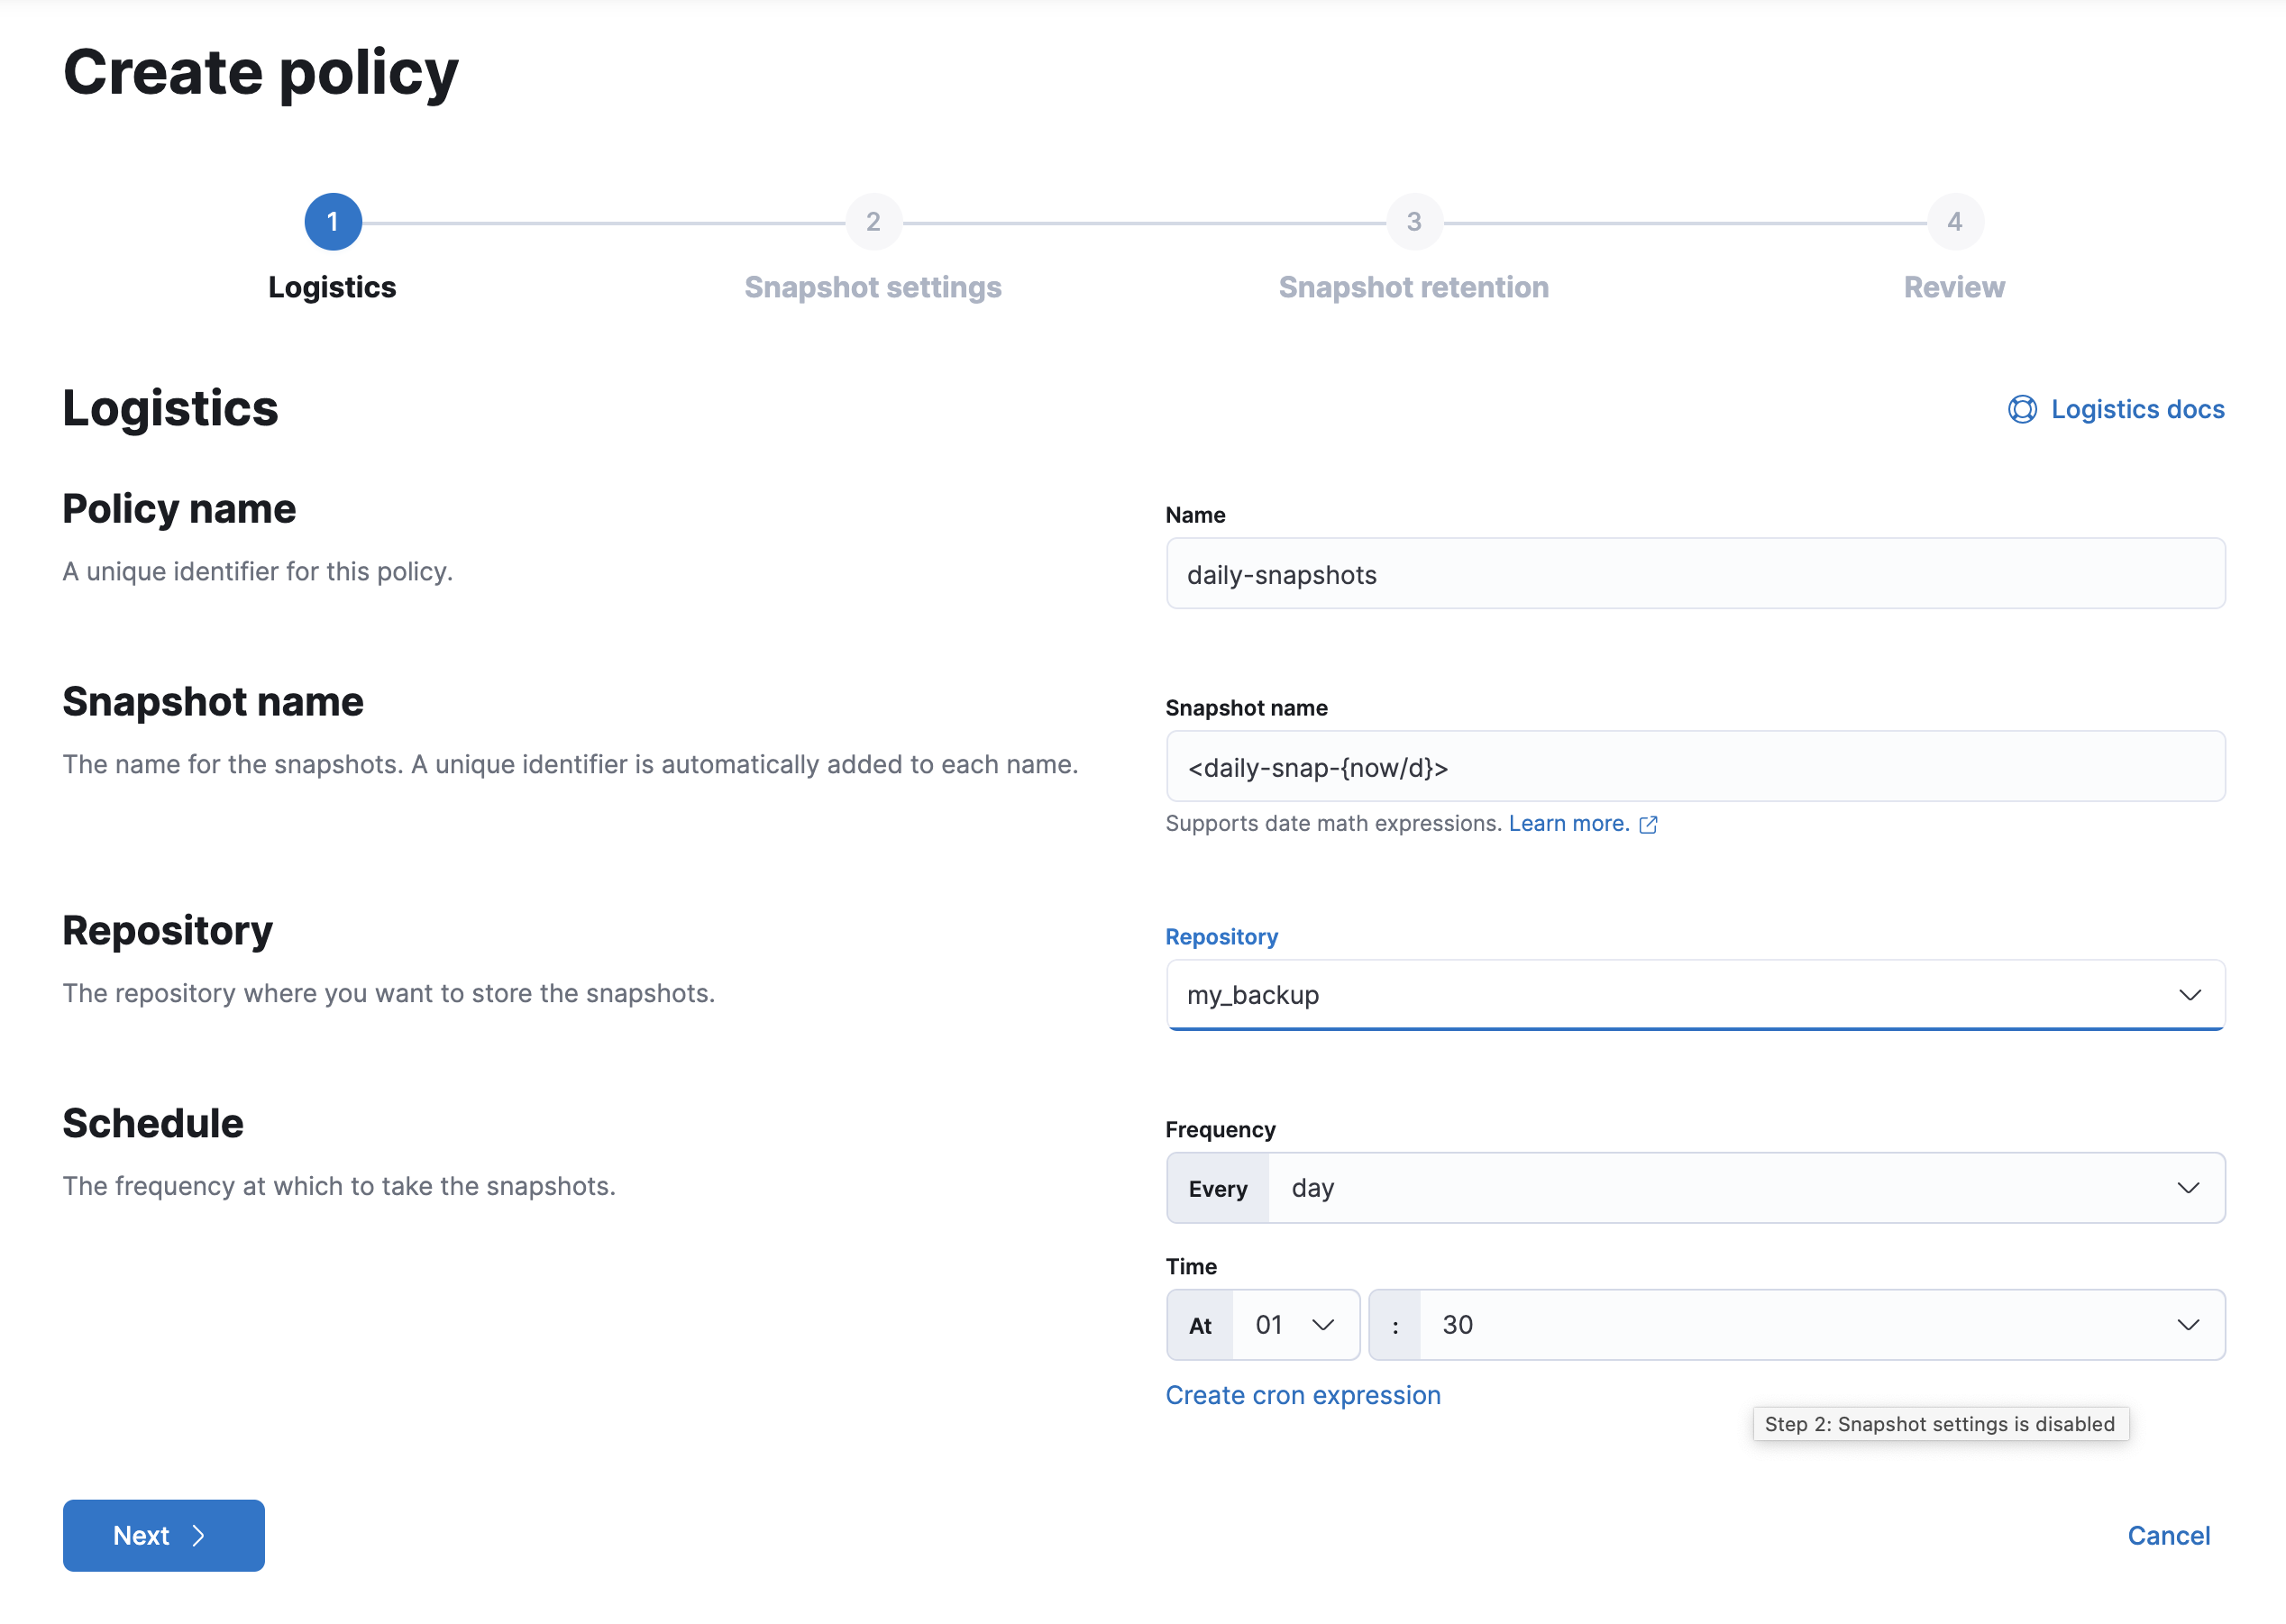
Click Create a policy.
-
As you walk through the wizard, enter the following values:
Logistics Policy name
daily-snapshotsSnapshot name
<daily-snap-{now/d}>Repository
my_backupSchedule
Every day at 1:30 a.m.
Snapshot settings
Data streams and indices
Select the data streams and indices to back up. By default, all data streams and indices, including system indices, are backed up.
All other settings
Use the defaults.
Snapshot retention
Expiration
30 daysSnapshots to retain
Minimum count:
5, Maximum count:50 -
Review your input, and then click Create policy.
Your new policy is listed in the Policies view, and you see a summary of its details.
Restore a snapshot
editFinally, you’ll restore data streams and indices from an existing snapshot.
-
In the Snapshots view, find the snapshot you want to restore, for example
2099-04-25_snapshot. - Click the restore icon in the Actions column.
-
As you walk through the wizard, enter the following values:
Logistics Data streams and indices
Toggle to choose specific data streams and indices to restore. Use the default to restore all data streams and indices in the snapshot.
Rename data streams and indices
Toggle to give your restored data streams and indices new names. Use the default to restore the original data stream and index names.
All other fields
Use the defaults.
Index settings
Modify index settings
Toggle to overwrite index settings when they are restored, or leave in place to keep existing settings.
Reset index settings
Toggle to reset index settings back to the default when they are restored, or leave in place to keep existing settings.
-
Review your restore settings, and then click Restore snapshot.
The operation loads for a few seconds, and then you’re navigated to Restore Status, where you can monitor the status of your restored data streams and indices.