Configuration options for Elastic Serverless Forwarder
editConfiguration options for Elastic Serverless Forwarder
editLearn more about configuration options for Elastic Serverless Forwarder, including more detail on permissions and policies, automatic routing of AWS service logs, and how to use AWS Secrets Manager for authentication.
You can transform or enrich data from AWS as it is parsed by the forwarder. This includes examples such as using tags and filters to organise your data and exclude specific messages, automatically discovering and collecting JSON content, and managing multiline messages effectively.
Permissions and policies
editA Lambda function’s execution role is an AWS Identity and Access Management (IAM) role that grants the function permission to access AWS services and resources. This role is automatically created when the function is deployed and Lambda assumes this role when the function is invoked.
When you provide the ARNs of AWS resources the forwarder will interact with, the Cloudformation template will create the correct IAM role with the appropriate IAM policies.
You can view the execution role associated with your Lambda function from the Configuration > Permissions section within . By default this role starts with the name serverlessrepo-. When the role is created, a custom policy is added to grant Lambda minimum permissions to be able to use the configured SQS queue, S3 buckets, Kinesis data stream, CloudWatch Logs log groups, Secrets manager (if using), and SQS replay queue.
The forwarder is granted the following ManagedPolicyArns permissions, which are automatically added by default to the Events configuration (if relevant):
arn:aws:iam::aws:policy/service-role/AWSLambdaBasicExecutionRole
arn:aws:iam::aws:policy/service-role/AWSLambdaKinesisExecutionRole
arn:aws:iam::aws:policy/service-role/AWSLambdaSQSQueueExecutionRole
In addition to these basic permissions, the following permissions are added when the function is created by the Cloudformation template of the function:
-
For SQS queue resources specified in the
SQS_CONTINUE_URLandSQS_REPLAY_URLenvironment variables, the following action is allowed:sqs:SendMessage -
For S3 bucket resources specified in the
S3_CONFIG_FILEenvironment variable, the following action is allowed on the S3 buckets' config file object key:s3:GetObject -
For every S3 bucket resource sending notifications to SQS queues, the following action is allowed on the S3 buckets:
s3:ListBucket -
For every S3 bucket resource sending notifications to SQS queues, the following action is allowed on the S3 buckets' keys:
s3:GetObject -
For every Secret Manager secret that you want to refer in the
config.yamlfile, the following action is allowed:secretsmanager:GetSecretValue -
Excepting the default key used to encrypt your Secret Manager secrets with, the following action is allowed for every decrypt key:
kms:Decrypt -
If any CloudWatch Logs log groups are set as Lambda inputs, the following actions are allowed for the resource:
-
arn:aws:logs:%AWS_REGION%:%AWS_ACCOUNT_ID%:log-group:*:* -
logs:DescribeLogGroups
-
Lambda resource-based policy for CloudWatch Logs subscription filter input
editFor CloudWatch Logs subscription filter log group resources that you want to use as triggers for the forwarder, the following is allowed as a resource-based policy in separate Policy statements:
  * Principal: logs.%AWS_REGION%.amazonaws.com
  * Action: lambda:InvokeFunction
  * Source ARN: arn:aws:logs:%AWS_REGION%:%AWS_ACCOUNT_ID%:log-group:%LOG_GROUP_NAME%:*
Use AWS Secrets Manager
editAWS Secrets Manager enables you to replace hardcoded credentials in your code, including passwords, with an API call to Secrets Manager to retrieve the secret programmatically. For more info, refer to the AWS Secrets Manager documentation.
There are 2 types of secrets that can be used:
- SecretString (plain text or key/value pairs)
- SecretBinary
The following code shows API calls to AWS Secrets Manager:
inputs:
  - type: "s3-sqs"
    id: "arn:aws:sqs:%REGION%:%ACCOUNT%:%QUEUENAME%"
    outputs:
      - type: "elasticsearch"
        args:
          elasticsearch_url: "arn:aws:secretsmanager:eu-central-1:123456789:secret:es_url"
          username: "arn:aws:secretsmanager:eu-west-1:123456789:secret:es_secrets:username"
          password: "arn:aws:secretsmanager:eu-west-1:123456789:secret:es_secrets:password"
          es_datastream_name: "logs-generic-default"
To use a plain text or binary secret, note the following format for the ARN:
arn:aws:secretsmanager:AWS_REGION:AWS_ACCOUNT_ID:secret:SECRET_NAME
In order to use a key/value pair secret, you need to provide the key at the end of the arn, as per:
arn:aws:secretsmanager:AWS_REGION:AWS_ACCOUNT_ID:secret:SECRET_NAME:SECRET_KEY
-
Secrets from different regions are supported, but the only version currently retrieved for a secret is
AWSCURRENT. - You cannot use the same secret for both plain text and key/value pairs.
- Secrets are case-sensitive.
-
Any configuration error or typo in the
config.yamlfile will be ignored (or exceptions raised) and secrets will not be retrieved. - Keys must exist in the AWS Secrets Manager.
- Empty values for a given key are not allowed.
Route AWS service logs
editFor S3 SQS Event Notifications inputs, the Elastic Serverless Forwarder supports automatic routing of several AWS service logs to the corresponding integration data streams for further processing and storage in the Elasticsearch cluster.
Automatic routing
editElastic Serverless Forwarder supports automatic routing of the following logs to the corresponding default integration data stream:
-
AWS CloudTrail (
aws.cloudtrail) -
Amazon CloudWatch (
aws.cloudwatch_logs) -
Elastic Load Balancing (
aws.elb_logs) -
AWS Network Firewall (
aws.firewall_logs) -
Amazon VPC Flow (
aws.vpcflow) -
AWS Web Application Firewall (
aws.waf)
For these use cases, setting the es_datastream_name field in the configuration file is optional.
For most other use cases, you will need to set the es_datastream_name field in the configuration file to route the data to a specific data stream or index. This value should be set in the following use cases:
- You want to write the data to a specific index, alias, or custom data stream, and not to the default integration data stream. This can help some users to use existing Elasticsearch assets like index templates, ingest pipelines, or dashboards, that are already set up and connected to business processes.
-
When using
Kinesis Data Stream,CloudWatch Logs subscription filterorDirect SQS message payloadinputs. Only theS3 SQS Event Notificationsinput method supports automatic routing to default integration data streams for several AWS service logs. -
When using
S3 SQS Event Notificationsbut where the log type is something other than AWS CloudTrail (aws.cloudtrail), Amazon CloudWatch Logs (aws.cloudwatch_logs), Elastic Load Balancing (aws.elb_logs), AWS Network Firewall (aws.firewall_logs), Amazon VPC Flow (aws.vpcflow), and AWS Web Application Firewall (aws.waf).
If the es_datastream_name is not specified, and the log cannot be matched with any of the above AWS services, then the dataset will be set to generic and the namespace set to default, pointing to the data stream name logs-generic-default.
Use tags and filters
editYou can use tags and filters to tag and filter messages based on regular expressions.
Use custom tags
editYou can add custom tags to filter and categorize items in events.
inputs:
  - type: "s3-sqs"
    id: "arn:aws:sqs:%REGION%:%ACCOUNT%:%QUEUENAME%"
    tags:
      - "tag1"
      - "tag2"
      - "tag3"
    outputs:
      - type: "elasticsearch"
        args:
          elasticsearch_url: "arn:aws:secretsmanager:eu-central-1:123456789:secret:es_url"
          username: "arn:aws:secretsmanager:eu-west-1:123456789:secret:es_secrets:username"
          password: "arn:aws:secretsmanager:eu-west-1:123456789:secret:es_secrets:password"
          es_datastream_name: "logs-generic-default"
Using the above example configuration, the tags will be set in the following way:
["forwarded", "generic", "tag1", "tag2", "tag3"]
The forwarded tag is always appended and the generic tag in this example comes from the dataset.
-
Tags must be defined within
inputsin theconfig.yamlfile. - Each tag must be a string and added to the list.
Define include/exclude filters
editYou can define multiple filters for inputs to include or exclude events from data ingestion.
inputs:
  - type: "s3-sqs"
    id: "arn:aws:sqs:%REGION%:%ACCOUNT%:%QUEUENAME%"
    include:
      - "[a-zA-Z]"
    exclude:
      - "skip this"
      - "skip also this"
    outputs:
      - type: "elasticsearch"
        args:
          elasticsearch_url: "arn:aws:secretsmanager:eu-central-1:123456789:secret:es_url"
          username: "arn:aws:secretsmanager:eu-west-1:123456789:secret:es_secrets:username"
          password: "arn:aws:secretsmanager:eu-west-1:123456789:secret:es_secrets:password"
          es_datastream_name: "logs-generic-default"
You can define a list of regular expressions within inputs.[].include. If this list is populated, only messages matching any of the defined regular expressions will be forwarded to the outputs.
You can define a list of regular expressions within inputs.[].exclude. If this list is populated, only messages not matching any of the defined regular expressions will be forwarded to the outputs i.e. every message will be forwarded to the outputs unless it matches any of the defined regular expressions.
Both config parameters are optional, and can be set independently of each other. In terms of rule precedence, the exclude filter is applied first and then the include filter, so exclude takes precedence if both are specified.
All regular expressions are case-sensitive and should follow Python’s 3.9 regular expression syntax.
Messages are scanned for terms that match the defined filters. Use the ^ (caret) special character to explicitly anchor the regex to the position before the first character of the string, and use $ to anchor at the end.
No flags are used when the regular expression is compiled. Please refer to inline flag documentation for alternative options for multiline, case-insensitive, and other matching behaviors.
JSON content discovery
editThe Elastic Serverless Forwarder is able to automatically discover JSON content in the payload of an input and collect the JSON objects contained in the payload.
The JSON objects can either be on a single line or spanning multiple lines. In the second case, the forwarder expects different JSON objects spanning multiple lines to be separated by a newline delimiter.
When JSON objects span multiple lines, a limit of 1000 lines is applied. Every JSON object spanning across more than 1000 lines will not be collected. Every line composing the whole JSON object will be forwarded individually instead.
If you have known payload content which includes single JSON objects that span more than 1000 lines, or if you find that relying on auto-discovery of JSON content has a big impact on performance, you can configure JSON content types within the inputs to address this. This will change the parsing logic and improve performance while overcoming the 1000 lines limit.
Where content is known to be plain text, you can improve overall performance by disabling automatic JSON content discovery completely.
To change this configuration option, set inputs.[].json_content_type to one of the following values:
- single: indicates that the content of a single item in the input payload is a single JSON object. The content can either be on a single line or spanning multiple lines. With this setting the whole content of the payload is treated as a JSON object, with no limit on the number of lines the JSON object spans.
- ndjson: indicates that the content of a single item in the input payload is a valid NDJSON format. Multiple single JSON objects formatted on a single line should be separated by a newline delimiter. With this setting each line will be treated as a JSON object, which improves the parsing performance.
- disabled: instructs the forwarder not to attempt any automatic JSON content discovery and instead treat the content as plain text, which improves the parsing performance.
JSON content is still stored in Elasticsearch as field type text. No automatic JSON expansion is performed by the forwarder; this can be achieved using the JSON processor in an ingest pipeline in Elasticsearch.
There is no need to configure the JSON content type when Expanding events from JSON object lists, unless you have single JSON objects that span more than 1000 lines.
Expanding events from JSON object lists
editYou can extract a list of events to be ingested from a specific field in the JSON file.
inputs:
  - type: "s3-sqs"
    id: "arn:aws:sqs:%REGION%:%ACCOUNT%:%QUEUENAME%"
    expand_event_list_from_field: "Records"
    # root_fields_to_add_to_expanded_event: "all"
    # root_fields_to_add_to_expanded_event: ["owner", "logGroup", "logStream"]
    outputs:
      - type: "elasticsearch"
        args:
          elasticsearch_url: "arn:aws:secretsmanager:eu-central-1:123456789:secret:es_url"
          username: "arn:aws:secretsmanager:eu-west-1:123456789:secret:es_secrets:username"
          password: "arn:aws:secretsmanager:eu-west-1:123456789:secret:es_secrets:password"
          es_datastream_name: "logs-generic-default"
You can define inputs.[].expand_event_list_from_field as a string with the value of a key in the JSON that contains a list of elements that must be sent as events instead of the encompassing JSON.
To inject root fields from the JSON object into the expanded events, define inputs.[].root_fields_to_add_to_expanded_event. The config takes one of the following values:
-
the literal string "all" to inject all root fields (except the field you are expanding events from). For example,
root_fields_to_add_to_expanded_event: "all" -
a list of the root fields that you want to inject. For example,
root_fields_to_add_to_expanded_event: ["owner", "logGroup", "logStream"]
When routing service logs, any value set for the expand_event_list_from_field configuration parameter will be ignored, because this will be automatically handled by the Elastic Serverless Forwarder.
Example without root_fields_to_add_to_expanded_event
editWith the following input:
{"Records":[{"key": "value #1"},{"key": "value #2"}]}
{"Records":[{"key": "value #3"},{"key": "value #4"}]}
Without setting expand_event_list_from_field, two events will be forwarded:
{"@timestamp": "2022-06-16T04:06:03.064Z", "message": "{\"Records\":[{\"key\": \"value #1\"},{\"key\": \"value #2\"}]}"}
{"@timestamp": "2022-06-16T04:06:13.888Z", "message": "{\"Records\":[{\"key\": \"value #3\"},{\"key\": \"value #4\"}]}"}
If expand_event_list_from_field is set to Records, four events will be forwarded:
{"@timestamp": "2022-06-16T04:06:21.105Z", "message": "{\"key\": \"value #1\"}"}
{"@timestamp": "2022-06-16T04:06:27.204Z", "message": "{\"key\": \"value #2\"}"}
{"@timestamp": "2022-06-16T04:06:31.154Z", "message": "{\"key\": \"value #3\"}"}
{"@timestamp": "2022-06-16T04:06:36.189Z", "message": "{\"key\": \"value #4\"}"}
Example with root_fields_to_add_to_expanded_event
editWith the following input:
{"Records":[{"key": "value #1"},{"key": "value #2"}], "field1": "value 1a", "field2": "value 2a"}
{"Records":[{"key": "value #3"},{"key": "value #4"}], "field1": "value 1b", "field2": "value 2b"}
If expand_event_list_from_field is set to Records, and root_fields_to_add_to_expanded_event to all, four events will be forwarded:
{"@timestamp": "2022-06-16T04:06:21.105Z", "message": "{\"key\": \"value #1\", \"field1\": \"value 1a\", \"field2\": \"value 2a\""}
{"@timestamp": "2022-06-16T04:06:27.204Z", "message": "{\"key\": \"value #2\", \"field1\": \"value 1a\", \"field2\": \"value 2a\""}
{"@timestamp": "2022-06-16T04:06:31.154Z", "message": "{\"key\": \"value #3\", \"field1\": \"value 1b\", \"field2\": \"value 2b\""}
{"@timestamp": "2022-06-16T04:06:36.189Z", "message": "{\"key\": \"value #4\", \"field1\": \"value 1b\", \"field2\": \"value 2b\""}
If expand_event_list_from_field is set to Records, and root_fields_to_add_to_expanded_event to ["field1"], four events will be forwarded:
{"@timestamp": "2022-06-16T04:06:21.105Z", "message": "{\"key\": \"value #1\", \"field1\": \"value 1a\""}
{"@timestamp": "2022-06-16T04:06:27.204Z", "message": "{\"key\": \"value #2\", \"field1\": \"value 1a\""}
{"@timestamp": "2022-06-16T04:06:31.154Z", "message": "{\"key\": \"value #3\", \"field1\": \"value 1b\""}
{"@timestamp": "2022-06-16T04:06:36.189Z", "message": "{\"key\": \"value #4\", \"field1\": \"value 1b\""}
Manage multiline messages
editForwarded content may contain messages that span multiple lines of text. For example, multiline messages are common in files that contain Java stack traces. In order to correctly handle these multiline events, you need to configure multiline settings for a specific input to specify which lines are part of a single event.
Configuration options
editYou can specify the following options for a specific input in the config.yaml file to control how the Elastic Serverless Forwarder deals with messages that span multiple lines.
inputs:
  - type: "s3-sqs"
    id: "arn:aws:sqs:%REGION%:%ACCOUNT%:%QUEUENAME%"
    multiline:
      type: pattern
      pattern: '^\\['
      negate: true
      match: after
    outputs:
      - type: "elasticsearch"
        args:
          elasticsearch_url: "arn:aws:secretsmanager:eu-central-1:123456789:secret:es_url"
          username: "arn:aws:secretsmanager:eu-west-1:123456789:secret:es_secrets:username"
          password: "arn:aws:secretsmanager:eu-west-1:123456789:secret:es_secrets:password"
          es_datastream_name: "logs-generic-default"
The forwarder takes all the lines that do not start with [ and combines them with the previous line that does. For example, you could use this configuration to join the following lines of a multiline message into a single event:
[beat-logstash-some-name-832-2015.11.28] IndexNotFoundException[no such index]
    at org.elasticsearch.cluster.metadata.IndexNameExpressionResolver$WildcardExpressionResolver.resolve(IndexNameExpressionResolver.java:566)
    at org.elasticsearch.cluster.metadata.IndexNameExpressionResolver.concreteIndices(IndexNameExpressionResolver.java:133)
    at org.elasticsearch.cluster.metadata.IndexNameExpressionResolver.concreteIndices(IndexNameExpressionResolver.java:77)
    at org.elasticsearch.action.admin.indices.delete.TransportDeleteIndexAction.checkBlock(TransportDeleteIndexAction.java:75)
Note that you should escape the opening square bracket ([) in the regular expression, because it specifies a character class i.e. a set of characters that you wish to match. You also have to escape the backslash (\) used for escaping the opening square bracket as raw strings are not used. Thus, ^\\[ will produce the required regular expression upon compiling.
inputs.[].multiline.type defines which aggregation method to use. The default is pattern. The other options are count, which enables you to aggregate a constant number of lines, and while_pattern, which aggregates lines by pattern without matching options.
inputs.[].multiline.pattern differs from the patterns supported by Logstash. See Python’s 3.9 regular expression syntax for a list of supported regexp patterns. Depending on how you configure other multiline options, lines that match the specified regular expression are considered either continuations of a previous line or the start of a new multiline event.
inputs.[].multiline.negate defines whether the pattern is negated. The default is false. This setting works only with pattern and while_pattern types.
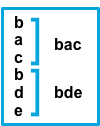
inputs.[].multiline.match changes the grouping of multiple lines according to the schema below (works only with pattern type):
Setting for |
Setting for |
Result |
Example |
|
|
Consecutive lines that match the pattern are appended to the previous line that doesn’t match. |
|
|
|
Consecutive lines that match the pattern are prepended to the next line that doesn’t match. |
|
|
|
Consecutive lines that don’t match the pattern are appended to the previous line that does match. |
|
|
|
Consecutive lines that don’t match the pattern are prepended to the next line that does match. |
|
The after setting is equivalent to previous in Logstash, and before is equivalent to next.
inputs.[].multiline.flush_pattern specifies a regular expression, in which the current multiline will be flushed from memory, ending the multiline-message. Works only with pattern type.
inputs.[].multiline.max_lines defines the maximum number of lines that can be combined into one event. If the multiline message contains more than max_lines, any additional lines are truncated from the event. The default is 500.
inputs.[].multiline.max_bytes defines the maximum number of bytes that can be combined into one event. If the multiline message contains more than max_bytes, any additional content is truncated from the event. The default is 10485760.
inputs.[].multiline.count_lines defines the number of lines to aggregate into a single event. Works only with count type.
inputs.[].multiline.skip_newline defined whether multiline events must be concatenated, stripping the line separator. If set to true, the line separator will be stripped. The default is false.
Examples of multiline configuration
editThe examples in this section cover the following use cases:
- Combining a Java stack trace into a single event
- Combining C-style line continuations into a single event
- Combining multiple lines from time-stamped events
Java stack traces
editJava stack traces consist of multiple lines, with each line after the initial line beginning with whitespace, as in this example:
Exception in thread "main" java.lang.NullPointerException
        at com.example.myproject.Book.getTitle(Book.java:16)
        at com.example.myproject.Author.getBookTitles(Author.java:25)
        at com.example.myproject.Bootstrap.main(Bootstrap.java:14)
This configuration merges any line that begins with whitespace up to the previous line:
multiline:
  type: pattern
  pattern: '^\s'
  negate: false
  match: after
This is a slightly more complex Java stack trace example:
Exception in thread "main" java.lang.IllegalStateException: A book has a null property
       at com.example.myproject.Author.getBookIds(Author.java:38)
       at com.example.myproject.Bootstrap.main(Bootstrap.java:14)
Caused by: java.lang.NullPointerException
       at com.example.myproject.Book.getId(Book.java:22)
       at com.example.myproject.Author.getBookIds(Author.java:35)
       ... 1 more
To consolidate these lines into a single event, use the following multiline configuration:
multiline:
  type: pattern
  pattern: '^\s+(at|.{3})\s+\\b|^Caused by:'
  negate: false
  match: after
In this example, the pattern matches and merges the following lines:
- a line that begins with spaces followed by the word at or ...
- a line that begins with the words Caused by:
In Python’s string literals, \b is the backspace character (ASCII value 8). As raw strings are not used, Python would convert the \b to a backspace. In order for our regular expression to match as expected, you need to escape the backslash \ in \b to \\b, which will produce the correct regular expression upon compiling.
Line continuations
editSeveral programming languages use the backslash (\) character at the end of a line to denote that the line continues, as in this example:
printf ("%10.10ld  \t %10.10ld \t %s\
  %f", w, x, y, z );
To consolidate these lines into a single event, use the following multiline configuration:
multiline:
  type: pattern
  pattern: '\\\\$'
  negate: false
  match: after
This configuration merges any line that ends with the \ character with the line that follows it.
Note that you should escape the opening backslash (\) twice in the regular expression, as raw strings are not used. Thus, \\\\$ will produce the required regular expression upon compiling.
Timestamps
editActivity logs from services such as Elasticsearch typically begin with a timestamp, followed by information on the specific activity, as in this example:
[2015-08-24 11:49:14,389][INFO ][env                      ] [Letha] using [1] data paths, mounts [[/
(/dev/disk1)]], net usable_space [34.5gb], net total_space [118.9gb], types [hfs]
To consolidate these lines into a single event, use the following multiline configuration:
multiline:
  type: pattern
  pattern: '^\\[[0-9]{4}-[0-9]{2}-[0-9]{2}'
  negate: true
  match: after
This configuration uses the negate: true and match: after settings to specify that any line that does not match the specified pattern belongs to the previous line.
Note that you should escape the opening square bracket ([) in the regular expression, because it specifies a character class i.e. a set of characters that you wish to match. You also have to escape the backslash (\) used for escaping the opening square bracket as raw strings are not used. Thus, ^\\[ will produce the required regular expression upon compiling.
Application events
editSometimes your application logs contain events, that begin and end with custom markers, such as the following example:
[2015-08-24 11:49:14,389] Start new event
[2015-08-24 11:49:14,395] Content of processing something
[2015-08-24 11:49:14,399] End event
To consolidate these lines into a single event, use the following multiline configuration:
multiline:
  type: pattern
  pattern: 'Start new event'
  negate: true
  match: after
  flush_pattern: 'End event'
The flush_pattern option specifies a regex at which the current multiline will be flushed. If you think of the pattern option specifying the beginning of an event, the flush_pattern option will specify the end or last line of the event.
This example will not work correctly if start/end log blocks are mixed with non-multiline logs, or if different start/end log blocks overlap with each other. For instance, Some other log log lines in the following example will be merged into a single multiline document because they neither match inputs.[].multiline.pattern nor inputs.[].multiline.flush_pattern, and inputs.[].multiline.negate is set to true.
[2015-08-24 11:49:14,389] Start new event
[2015-08-24 11:49:14,395] Content of processing something
[2015-08-24 11:49:14,399] End event
[2015-08-24 11:50:14,389] Some other log
[2015-08-24 11:50:14,395] Some other log
[2015-08-24 11:50:14,399] Some other log
[2015-08-24 11:51:14,389] Start new event
[2015-08-24 11:51:14,395] Content of processing something
[2015-08-24 11:51:14,399] End event
Test your regexp pattern for multiline
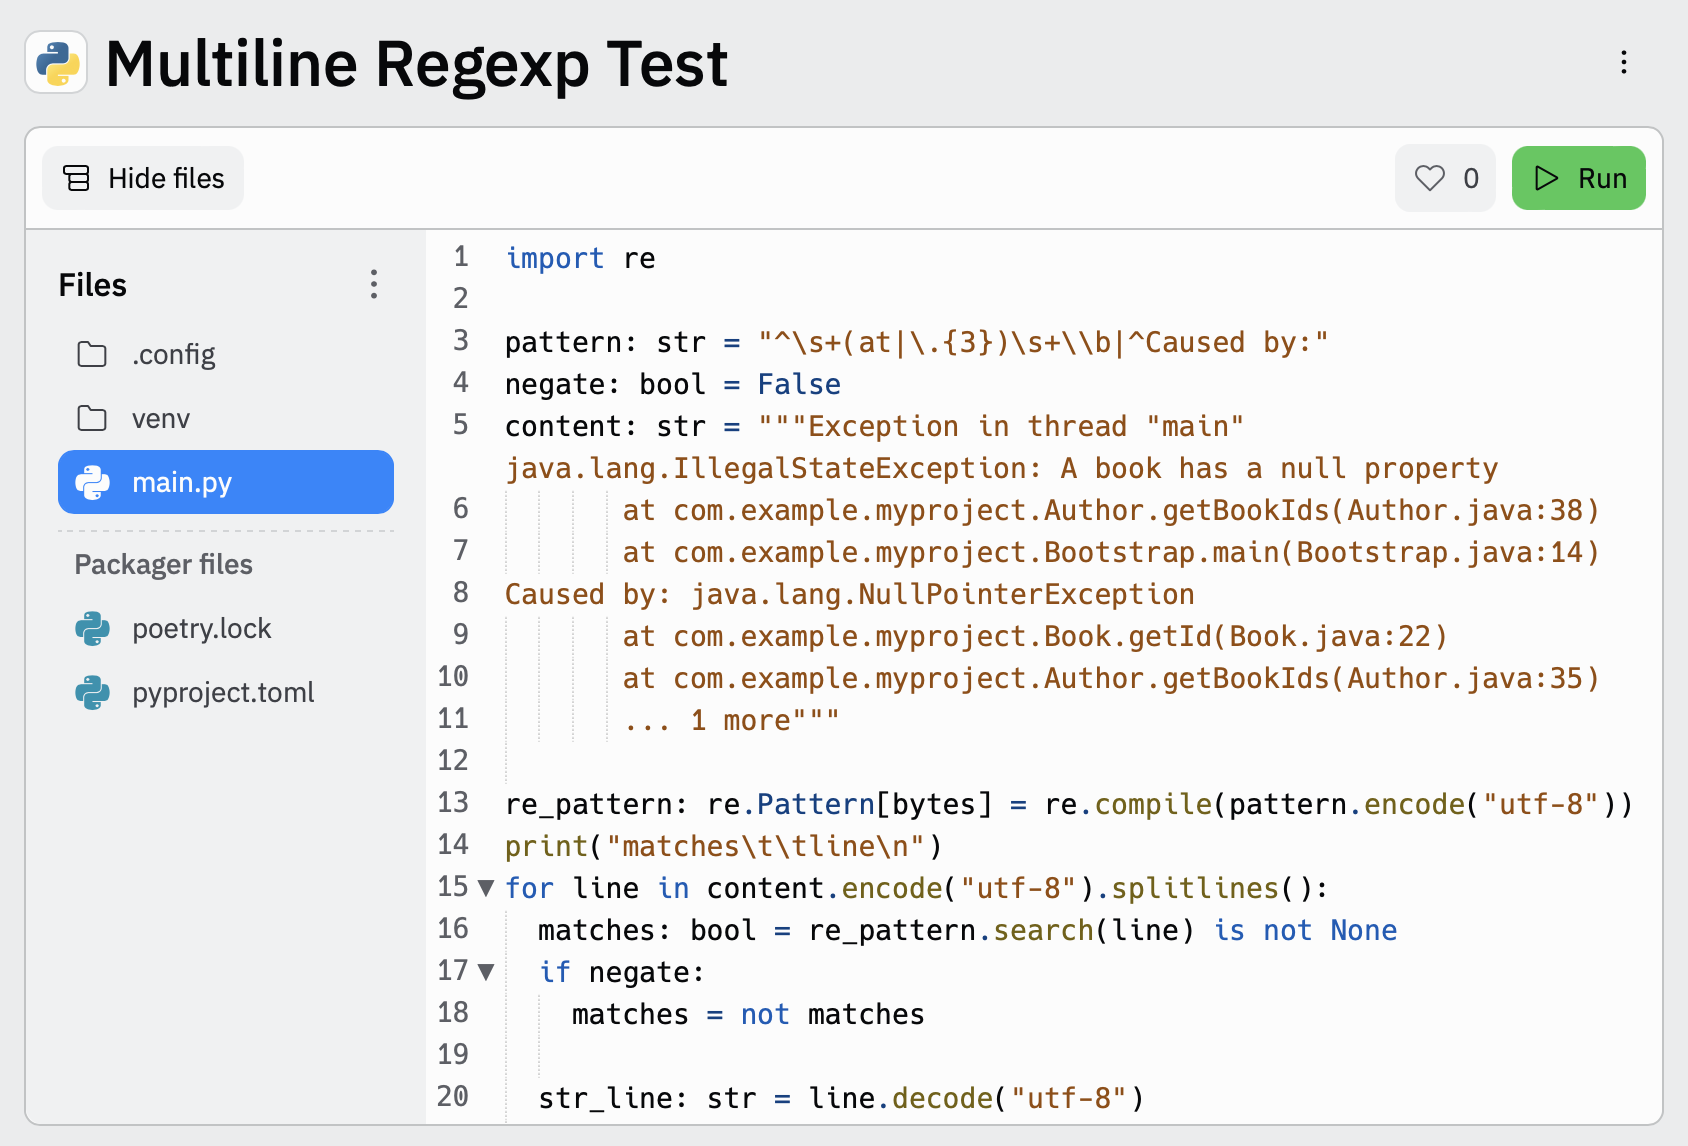
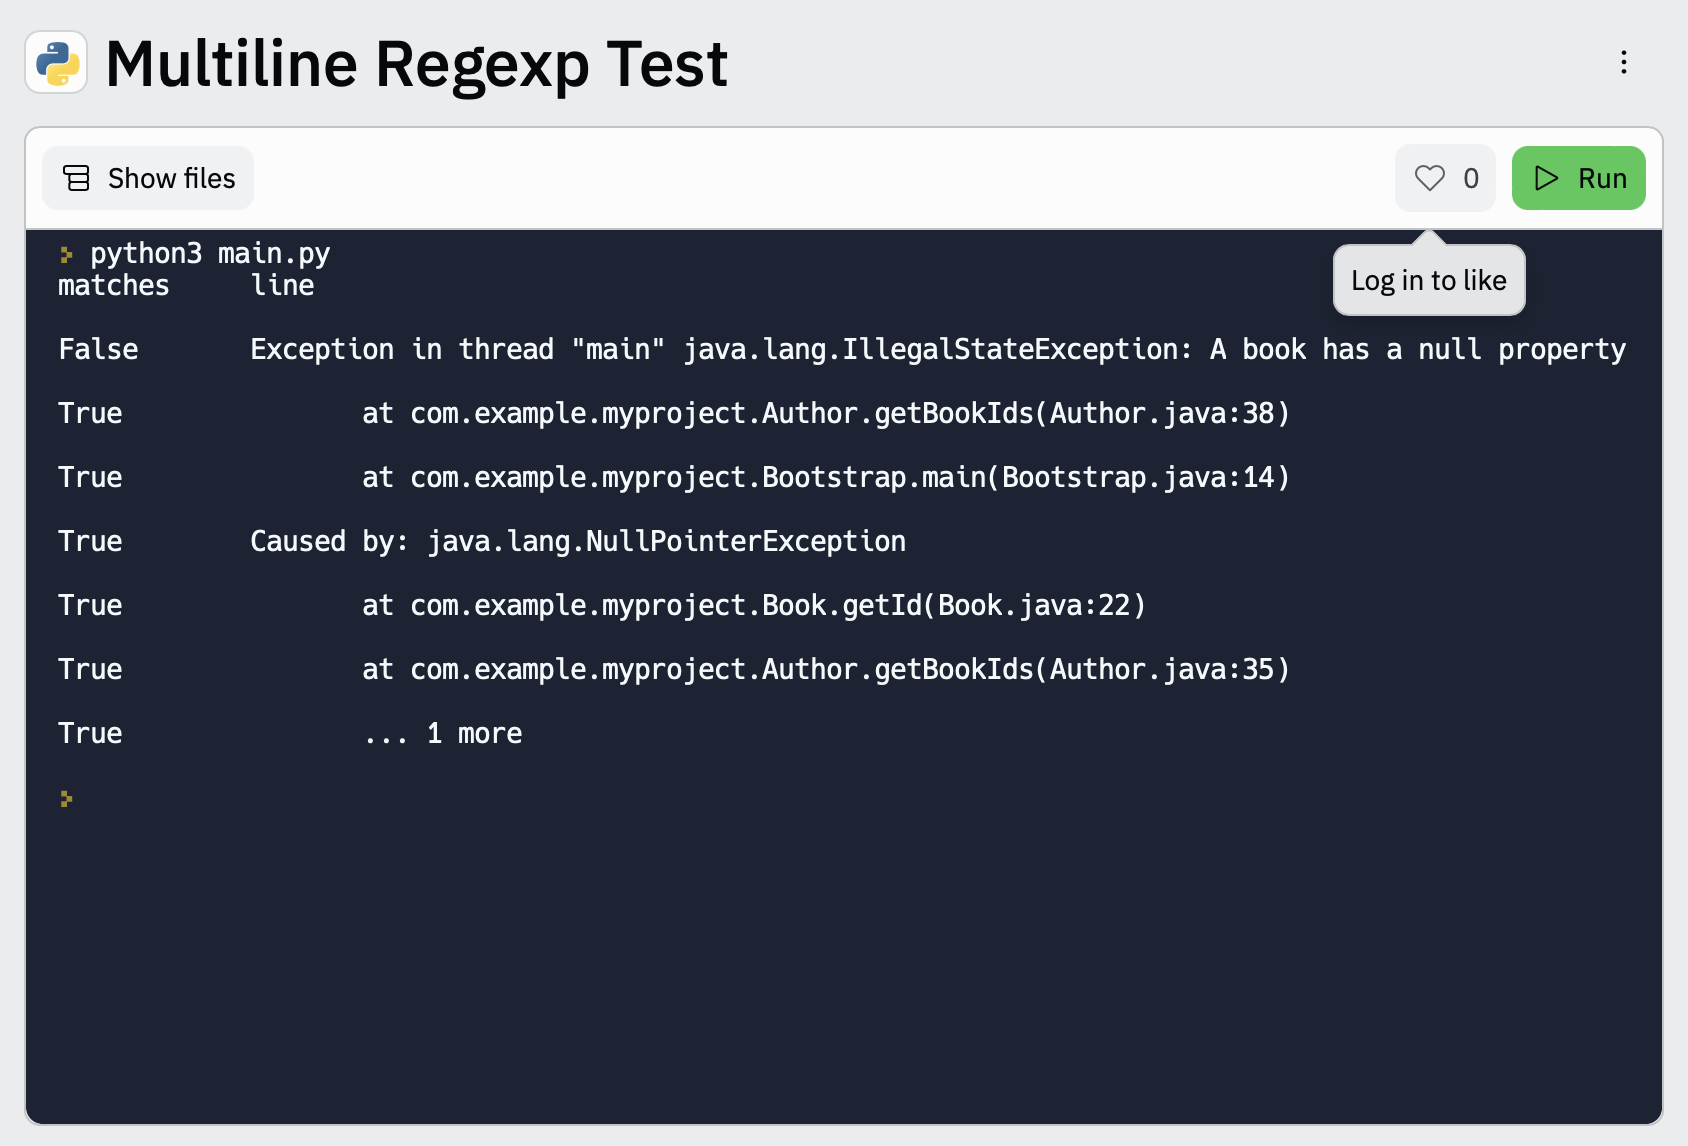
editTo make it easier for you to test the regexp patterns in your multiline config, you can use this Multiline Regexp Test:
-
Plug in the regexp pattern at line
3, along with themultiline.negatesetting that you plan to use at line4 -
Paste a sample message between the three double quote delimiters (
""" """) at line5 -
Click
Runto see which lines in the message match your specified configuration.
Manage self-signed certificates
editFrom v1.5.0, ESF introduced the SSL fingerprint option to access Elasticsearch clusters using self-signed certificates.
Configuration options
editTo set the ssl_assert_fingerprint option, you must edit the config file stored in the S3 bucket.
Suppose you have a config.yml file stored in the bucket with the following content:
inputs:
  - type: "s3-sqs"
    id: "arn:aws:sqs:eu-west-1:123456789:dev-access-logs"
    outputs:
      - type: "elasticsearch"
        args:
          api_key: "<REDACTED>"
          es_datastream_name: "logs-aws.s3access-default"
          batch_max_actions: 500
          batch_max_bytes: 10485760
          ssl_assert_fingerprint: ""
If the configuration omits the ssl_assert_fingerprint or, like in this example, is empty (the default option), the HTTP client validates the certificates of Elasticsearch clusters.
Get the SSL fingerprint
editThe next step is to get the fingerprint of the HTTPS certificate your Elasticsearch cluster is using now.
You can use OpenSSL to get the fingerprint for your certificate. Here’s an example using an Elasticsearch cluster hosted on Elastic Cloud:
$ openssl s_client \
    -connect my-deployment.es.eastus2.azure.elastic-cloud.com:443 \
    -showcerts </dev/null 2>/dev/null | openssl x509 -noout -fingerprint

SHA1 Fingerprint=1C:46:32:75:AA:D6:F1:E2:8E:10:A3:64:44:B1:36:C9:7D:44:35:B4
You can use your DNS name, IP address, and port number instead of my-deployment.es.eastus2.azure.elastic-cloud.com:443 from the above example.
Copy your fingerprint value for the next step.
Set the SSL fingerprint
editAs a final step, edit your config.yml file to use the SSL fingerprint:
inputs:
  - type: "s3-sqs"
    id: "arn:aws:sqs:eu-west-1:123456789:dev-access-logs"
    outputs:
      - type: "elasticsearch"
        args:
          api_key: "<REDACTED>"
          es_datastream_name: "logs-aws.s3access-default"
          batch_max_actions: 500
          batch_max_bytes: 10485760
          ssl_assert_fingerprint: "1C:46:32:75:AA:D6:F1:E2:8E:10:A3:64:44:B1:36:C9:7D:44:35:B4"

