Cases
editCases
editCases are used to open and track security issues directly in the Elastic Security app.
All cases list the original reporter and all users who contribute to a case
(participants). Comments support Markdown syntax and allow linking to saved Timelines. Additionally, you can send cases to these
external systems from within Elastic Security:
- ServiceNow ITSM
- ServiceNow SecOps
- Jira (including Jira Service Desk)
- IBM Resilient
- Swimlane
Configure external connections describes how to set up external integrations. When configuring case fields, note that data from mapped fields can be pushed to external systems but cannot be pulled in.
You can create and manage cases via the UI or the Cases API.
To send cases to external systems, you need the appropriate license and your role needs All privileges for the Action and Connectors feature. For information about the base role privileges you need to view or update cases, see Cases prerequisites.

Open a new case
editOpen a new case to keep track of security issues and share their details with colleagues.
- Go to Cases → Create new case.
-
Give the case a name, and add a description and any relevant tags.
In the
Descriptionarea, you can use Markdown syntax and insert a timeline link (click the icon in the top right corner of the area). - Choose whether you want alert statuses to sync with the case’s status after they are added to the case. This option is enabled by default, but you can still turn it off after creating the case.
- When ready, create the case.
-
If external connections are configured, you can:
-
Select which connector is used to send the case to an external system
(
External incident management system). - Send the case to an external system. You can send the case to more than one external system.
-
Select which connector is used to send the case to an external system
(

Manage existing cases
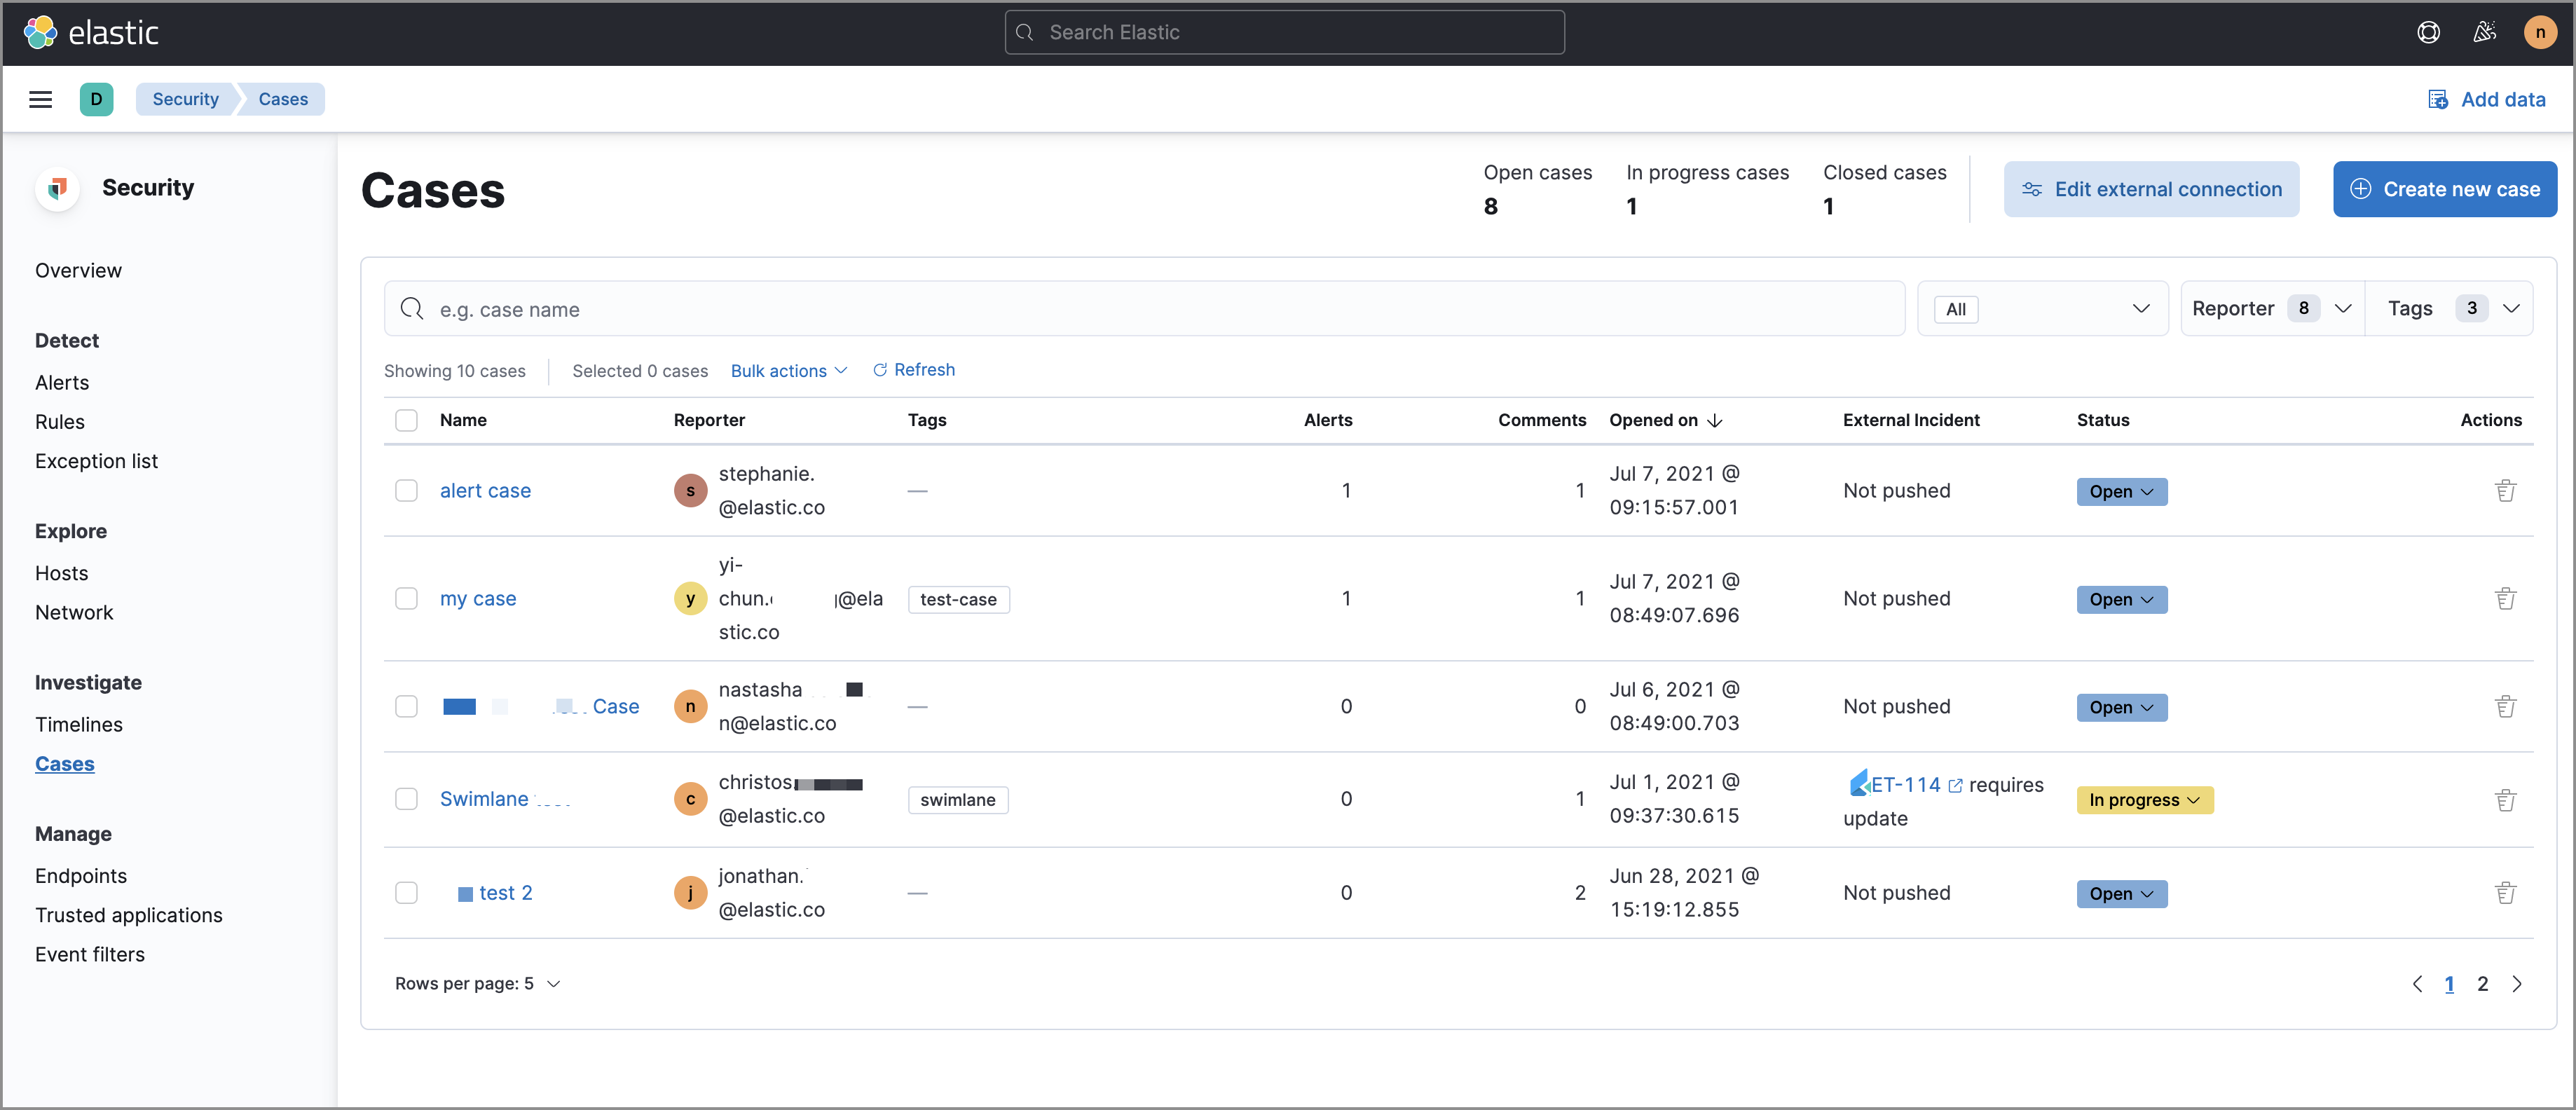
editYou can search existing cases and filter them by tags, reporter, and status (open, in-progress, or closed).
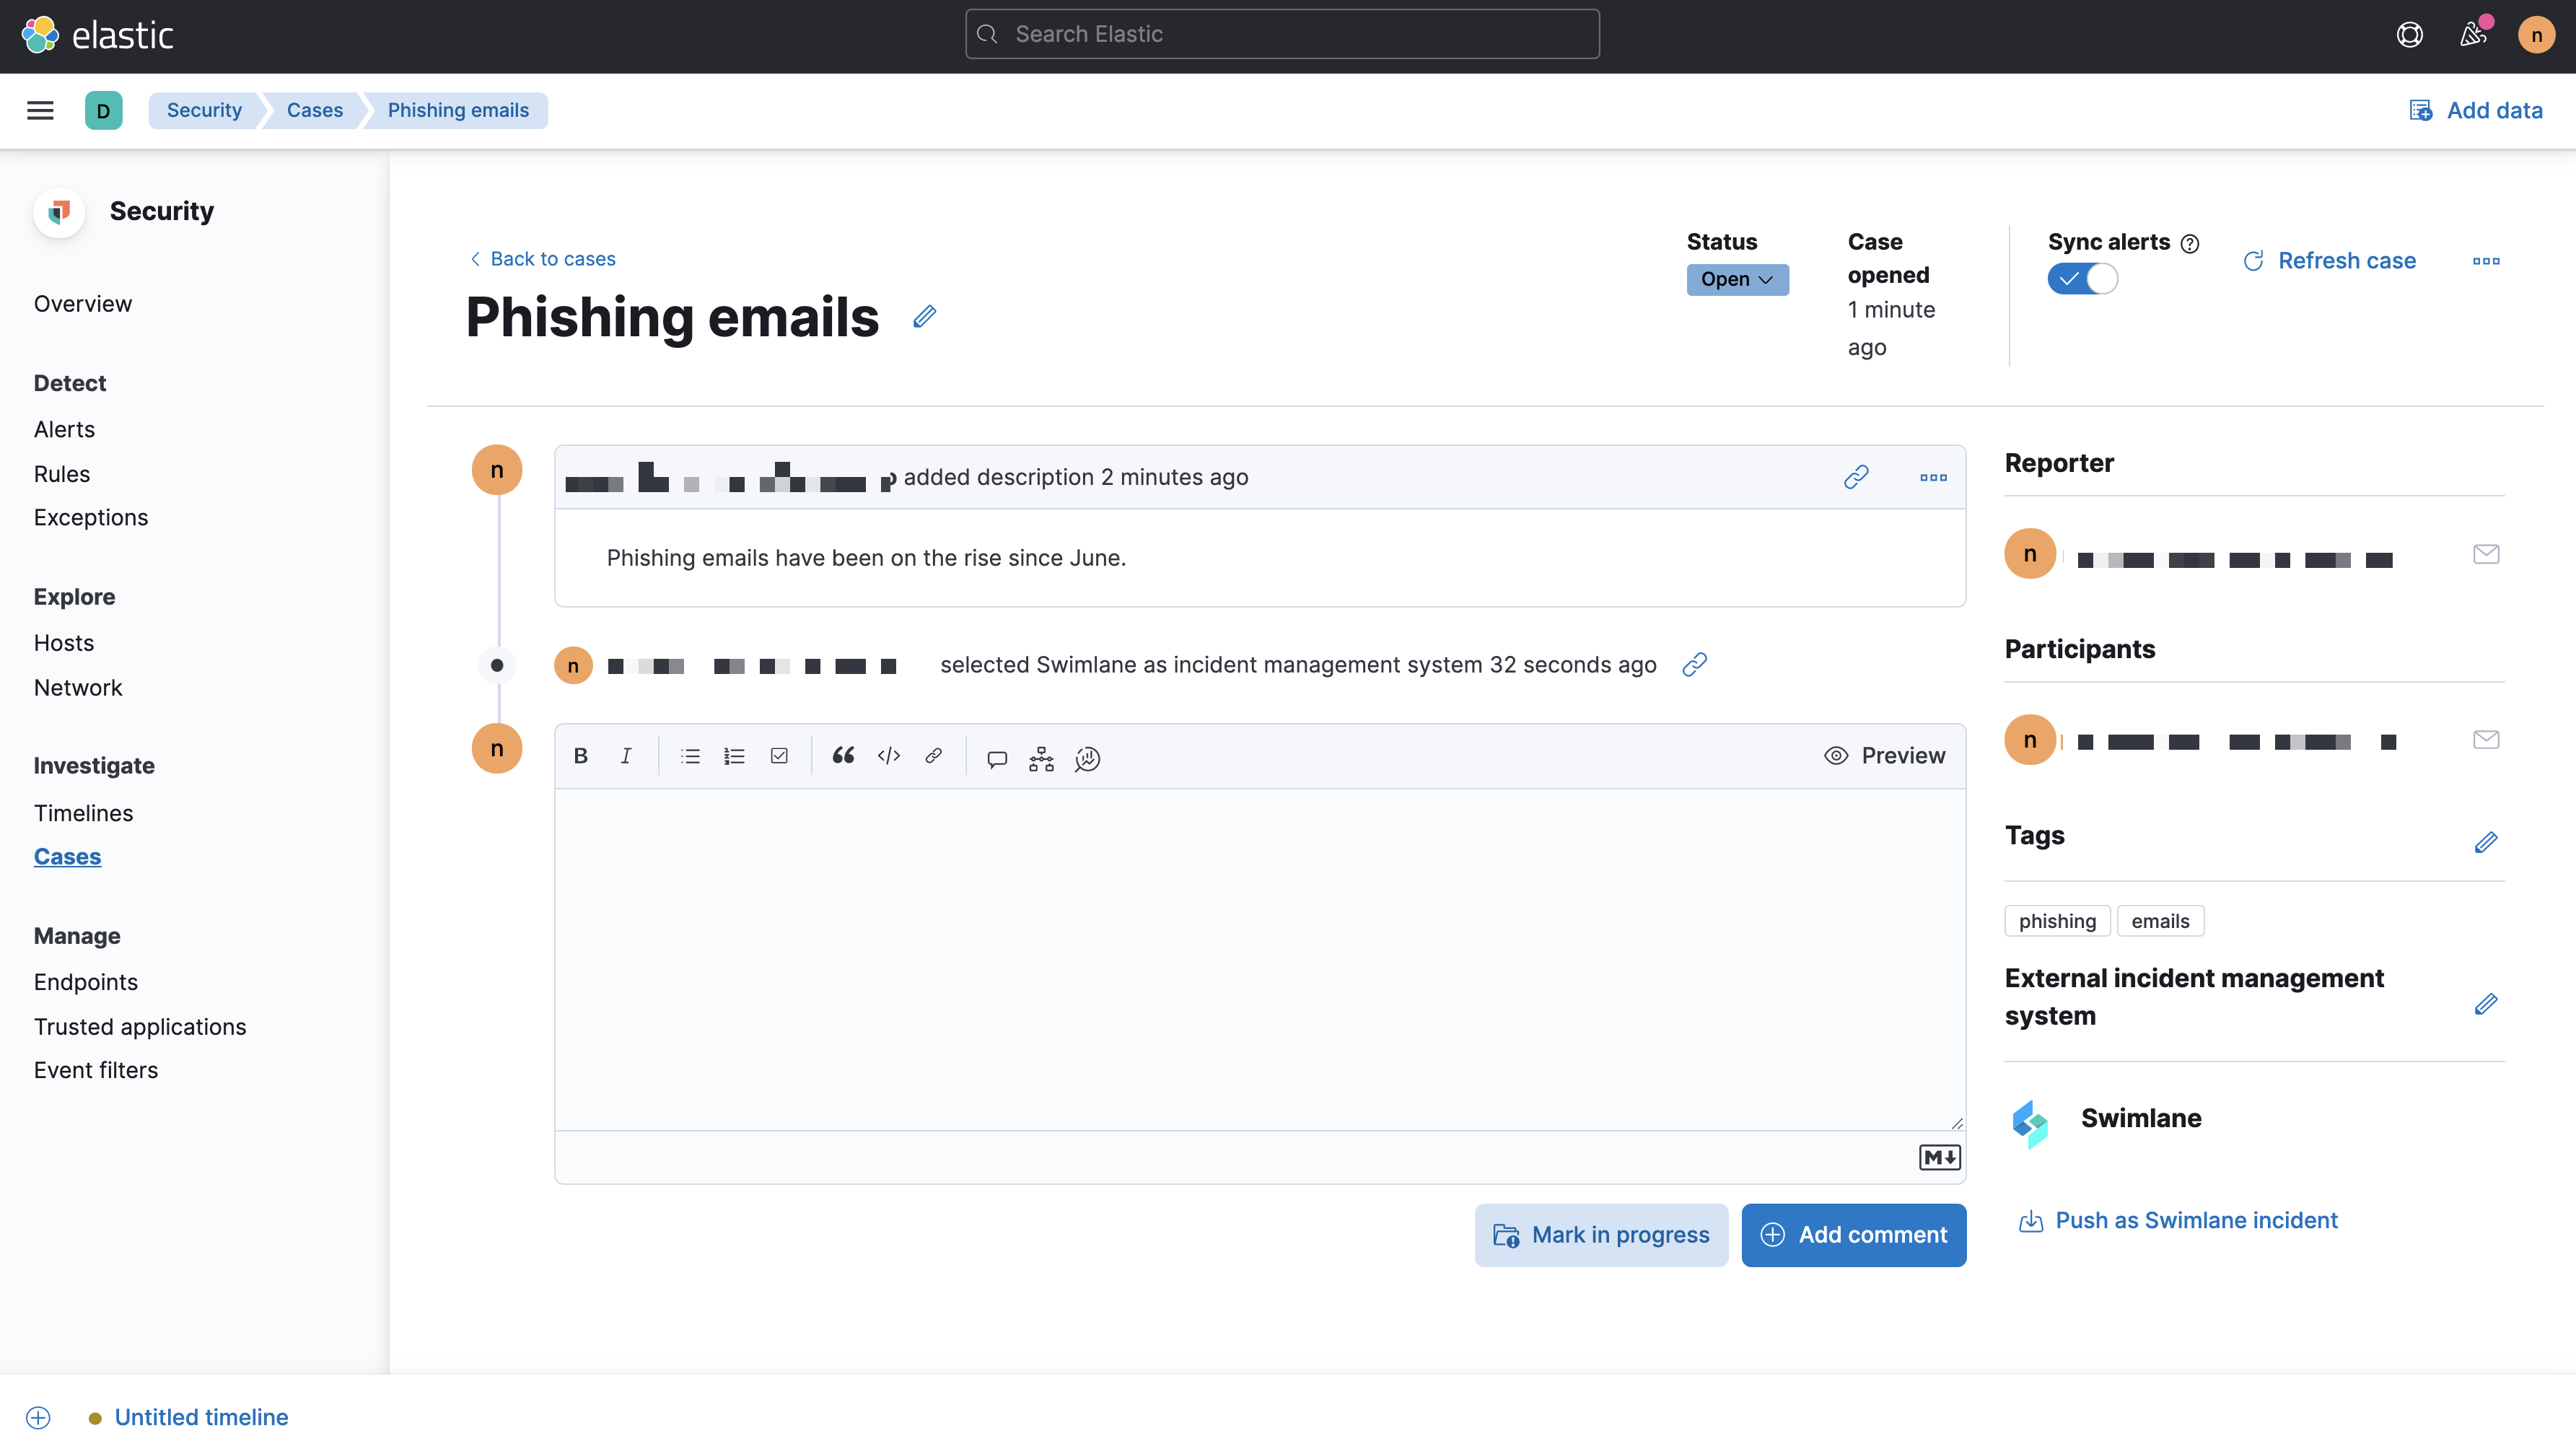
To view a case, click on its name. You can then:
- Add a new comment
- Add a Lens visualization
- Edit existing comments and the case’s description
- Add a connector (if you did not select one while creating the case)
- Send updates to external systems (if external connections are configured)
- Close the case
- Reopen a closed case
- Edit tags
- Refresh the case to retrieve the latest updates
Comments can also contain Markdown syntax and Timeline links.
Add a Lens visualization
editThis functionality is in beta and is subject to change. The design and code is less mature than official GA features and is being provided as-is with no warranties. Beta features are not subject to the support SLA of official GA features.
Add a Lens visualization to your case to portray event and alert data through charts and graphs.

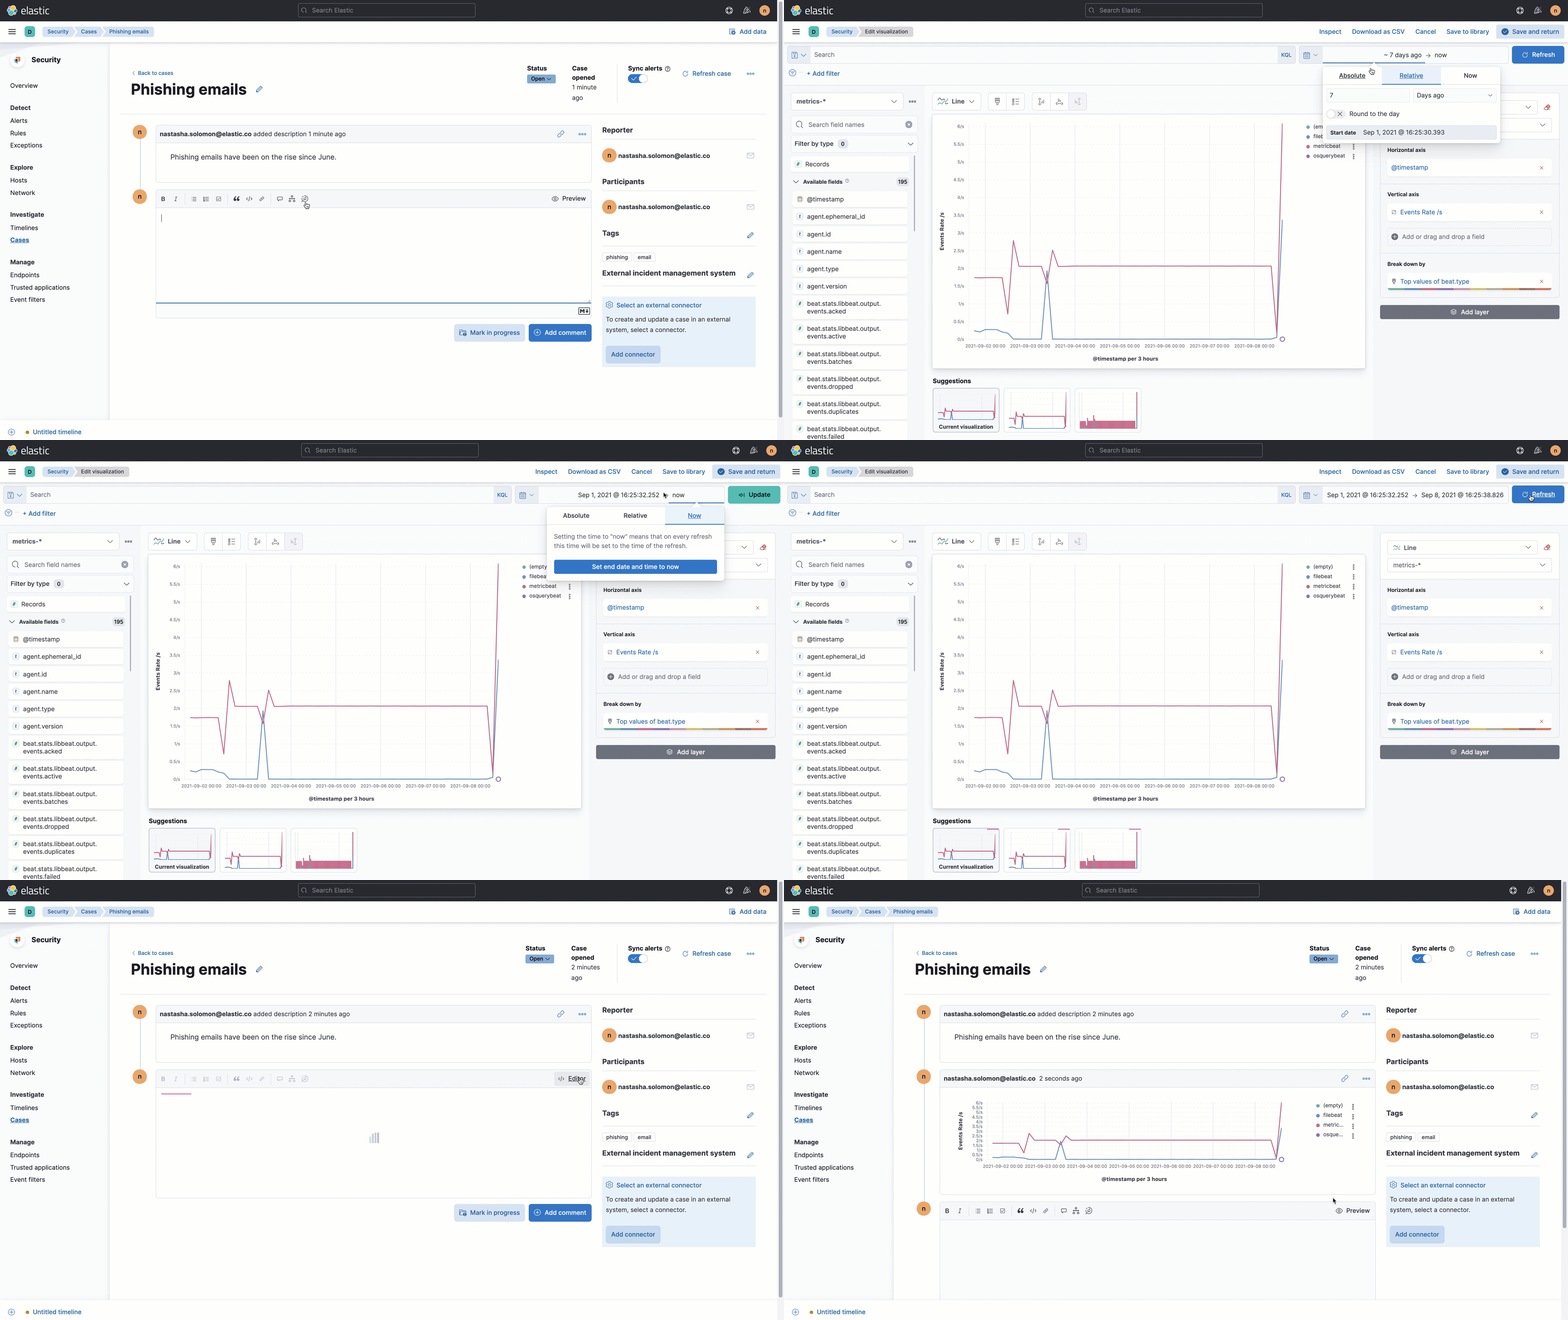
To add a Lens visualization to a comment within your case:
- Click the Visualization button. The Add visualization dialog appears.
-
Select an existing visualization from your Visualize Library or create a new visualization.
Set an absolute time range for your visualization. This ensures your visualization doesn’t change over time after you save it to your case and provides important context for other viewers.
-
Save the visualization to your Visualize Library by clicking the Save to library button (optional).
- Enter a title and description for the visualization.
- Choose whether you want to keep the Update panel on Security activated. This option is activated by default and automatically adds the visualization to your Visualize Library.
- After you’ve finished creating your visualization, click Save and return to go back to your case.
- Click Preview to see how the visualization will appear in the case comment.
- Click Add Comment to add the visualization to your case.
Once a visualization has been added to a case, it cannot be modified or deleted. However, you can interact with the visualization by clicking the Open Visualization option in the comment menu.
