Fleet settings
editFleet settings
editThe settings described here are configurable through the Fleet UI. Refer to
Fleet settings in Kibana for a list of
settings that you can configure in the kibana.yml configuration file.
On the Settings tab in Fleet, you can configure global settings available to all Elastic Agents enrolled in Fleet. This includes Fleet Server hosts and output settings.
Fleet Server host settings
editClick Edit hosts and specify the host URLs your Elastic Agents will use to connect to a Fleet Server.
If the Edit hosts option is grayed out, Fleet Server hosts are configured outside of Fleet. For more information, refer to Fleet settings in Kibana.
Not sure if Fleet Server is running? Refer to What is Fleet Server?.
On self-managed clusters, you must specify one or more URLs.
On Elastic Cloud, this field is populated automatically. If you are using Azure Private Link, GCP Private Service Connect, or AWS PrivateLink and enrolling the Elastic Agent with a private link URL, ensure that this setting is configured. Otherwise, Elastic Agent will reset to use a default address instead of the private link URL.
If a URL is specified without a port, Kibana sets the port to 80 (http)
or 443 (https).
By default, Fleet Server is typically exposed on the following ports:
-
8220 - Default Fleet Server port for self-managed clusters
-
443or9243 - Default Fleet Server port for Elastic Cloud. View the Fleet Settings tab to find the actual port that’s used.
The exposed ports must be open for ingress and egress in the firewall and networking rules on the host to allow Elastic Agents to communicate with Fleet Server.
Specify multiple URLs (click Add row) to scale out your deployment and provide automatic failover. If multiple URLs exist, Fleet shows the first provided URL for enrollment purposes. Enrolled Elastic Agents will connect to the URLs in round robin order until they connect successfully.
When a Fleet Server is added or removed from the list, all agent policies are updated automatically.
Examples:
-
https://192.0.2.1:8220 -
https://abae718c1276457893b1096929e0f557.fleet.eu-west-1.aws.qa.cld.elstc.co:443 -
https://[2001:db8::1]:8220
Output settings
editAdd or edit output settings to specify where Elastic Agents send data. Elastic Agents use the default output if you don’t select an output in the agent policy.
The Elastic Cloud internal output is locked and cannot be edited. This output is used for internal routing to reduce external network charges when using the Elastic Cloud agent policy. It also provides visibility for troubleshooting on Elastic Cloud Enterprise.
To add or edit an output:
- Go to Fleet → Settings.
-
Under Outputs, click Add output or Edit.
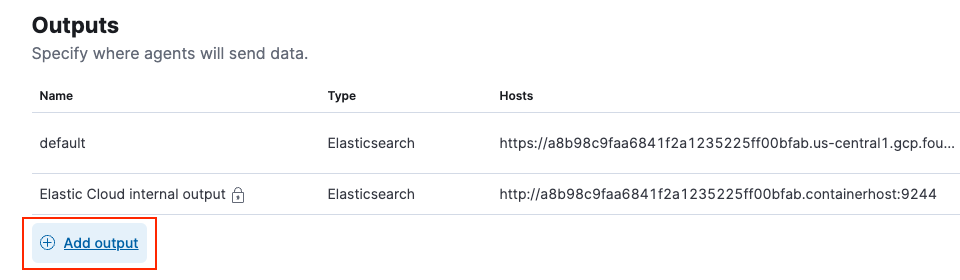
The Add new output UI opens.
- Set the output name and type.
-
Specify settings for the output type you selected:
- Click Save and apply settings.
If the options for editing an output are grayed out, outputs are configured outside of Fleet. For more information, refer to Fleet settings in Kibana.
Agent binary download settings
editElastic Agents must be able to access the Elastic Artifact Registry to download
binaries during upgrades. By default Elastic Agents download artifacts from the
artifact registry at https://artifacts.elastic.co/downloads/.
For Elastic Agents that cannot access the internet, you can specify agent binary download settings, and then configure agents to download their artifacts from the alternate location. For more information about running Elastic Agents in a restricted environment, refer to Air-gapped environments.
To add or edit the source of binary downloads:
- Go to Fleet → Settings.
- Under Agent Binary Download, click Add agent binary source or Edit.
- Set the agent binary source name.
- For Host, specify the address where you are hosting the artifacts repository.
- (Optional) To make this location the default, select Make this host the default for all agent policies. Elastic Agents use the default location if you don’t select a different agent binary source in the agent policy.
Host name format settings
editThese settings control the format of information provided about the current host through the host.name key, in events produced by Elastic Agent.
|
When this setting is selected, information about the current host is in a non-fully-qualified format ( |
|
|
When this setting is selected, information about the current host is in FQDN format ( This functionality is in technical preview and may be changed or removed in a future release. Elastic will work to fix any issues, but features in technical preview are not subject to the support SLA of official GA features. FQDN reporting is not currently supported in APM. For FQDN reporting to work as expected, the hostname of the current host must either:
If neither pre-requisite is satisfied, |