Agent Builder is available now GA. Get started with an Elastic Cloud Trial, and check out the documentation for Agent Builder here.
Recently, OpenAI announced the custom connectors feature for ChatGPT on Pro/Business/Enterprise and Edu plans. In addition to out-of-the-box connectors to tap data on Gmail, GitHub, Dropbox, etc. It is possible to create custom connectors using MCP servers.
Custom connectors give you the ability to combine your existing ChatGPT connectors with additional sources of data like Elasticsearch to get comprehensive answers.
In this article, we’ll build an MCP server that connects ChatGPT to an Elasticsearch index containing information on internal GitHub issues and pull requests. This enables natural language queries to be answered using your Elasticsearch data.
We’ll deploy the MCP server using the FastMCP on Google Colab with ngrok to get a public URL that ChatGPT can connect to, eliminating the need for complex infrastructure setup.
For a comprehensive overview of MCP and its ecosystem, refer to The Current State of MCP.
Prerequisites
Before starting, you will need:
- Elasticsearch cluster (8.X or higher)
- Elasticsearch API key with read access to your index
- Google account (for Google Colab)
- Ngrok account (free tier works)
- ChatGPT account with Pro/Enterprise/Business or Edu plan
Understanding ChatGPT MCP connector requirements
ChatGPT MCP connectors require implementing two tools: search and fetch. For more details, refer to OpenAI Docs.
Search tool
Returns a list of relevant results from your Elasticsearch index based on a user query.
What it receives:
- A single string with the user’s natural language query.
- Example: “Find issues related to Elasticsearch migration.”
What it returns:
- An object with a
resultkey containing an array of result objects. Each result includes:id- Unique Document identifiertitle- Issue or PR titleurl- Link to the issue/PR
In our implementation:
Fetch tool
Retrieves the complete content of a specific document.
What it receives:
- A single string with the Elasticsearch document ID from the search result
- Example: “Get me the details of PR-578.”
What it returns:
- A complete document object with:
id- Unique Document identifiertitle- Issue or PR titletext- Complete issue/PR description and detailsurl- Link to the issue/PRtype- Document type (issue, pull_request)status- Current status (open, in_progress, resolved)priority- Priority level (low, medium, high, critical)assignee- Person assigned to the issue/PRcreated_date- When it was createdresolved_date- When it was resolved (if applicable)labels- Tags associated with the documentrelated_pr- Related pull request ID
Note: This example uses a flat structure where all fields are at the root level. OpenAI requirements are flexible and also support nested metadata objects.
GitHub issues and PRs dataset
For this tutorial, we are going to use an internal GitHub dataset containing issues and pull requests. This represents a scenario where you want to query private, internal data through ChatGPT.
The dataset can be found here. And we will update the index of the data using the bulk API.
This dataset includes:
- Issues with descriptions, status, priority, and assignees
- Pull requests with code changes, reviews, and deployment info
- Relationships between issues and PRs (e.g., PR-578 fixes ISSUE-1889)
- Labels, dates, and other metadata
Index mappings
The index uses the following mappings to support hybrid search with ELSER. The text_semantic is used for semantic search, while other fields enable keyword search.
Build the MCP server
Our MCP server implements two tools following OpenAI specifications, using hybrid search to combine semantic and text matching for better results.
Search tool
Uses hybrid search with RRF (Reciprocal Rank Fusion), combining semantic search with text matching:
Key points:
- Hybrid search with RRF: Combines semantic search (ELSER) and text search (BM25) for better results.
- Multi-match query: Searches across multiple fields with boosting (title^3, text^2, assignee^2). The caret symbol (^) multiplies relevance scores, prioritizing matches in titles over content.
- Fuzzy matching:
fuzziness: AUTOhandles typos and misspellings by allowing approximate matches. - RRF parameter tuning:
rank_window_size: 50- Specifies how many top results from each retriever (semantic and text) are considered before merging.rank_constant: 60- This value determines how much influence documents in individual result sets have over the final ranked result.
- Returns only the required fields:
id,title,urlper OpenAI specification, and avoids exposing additional fields unnecessarily.
Fetch tool
Retrieves document details by document ID, where it exists:
Key points:
- Search by document ID field: Uses term query on the custom
idfield - Returns complete document: Includes full
textfield with all content - Flat structure: All fields at the root level, matching Elasticsearch's document structure.
Deploy on Google Colab
We'll use Google Colab to run our MCP server and ngrok to expose it publicly so ChatGPT can connect to it.
Step 1: Open the Google Colab notebook
Access our pre-configured notebook Elasticsearch MCP for ChatGPT.
Step 2: Configure your credentials
You’ll need three pieces of information:
- Elasticsearch URL: Your Elasticsearch cluster URL.
- Elasticsearch API Key: API key with read access to your index.
- Ngrok Auth Token: Free token from ngrok. We will use ngrok to expose the MCP URL to the internet so ChatGPT can connect to it.
Getting your ngrok token
- Sign up for a free account at ngrok
- Go to your ngrok dashboard
- Copy your auth token
Adding secrets to Google Colab
In the Google Colab notebook:
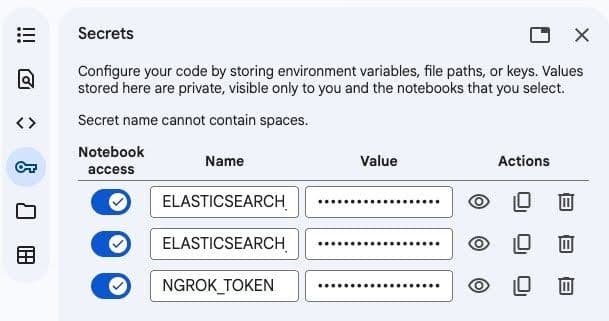
- Click the Key icon in the left sidebar to open Secrets.
- Add these three secrets:
3. Enable notebook access for each secret
Step 3: Run the notebook
- Click Runtime and then Run all to execute all cells
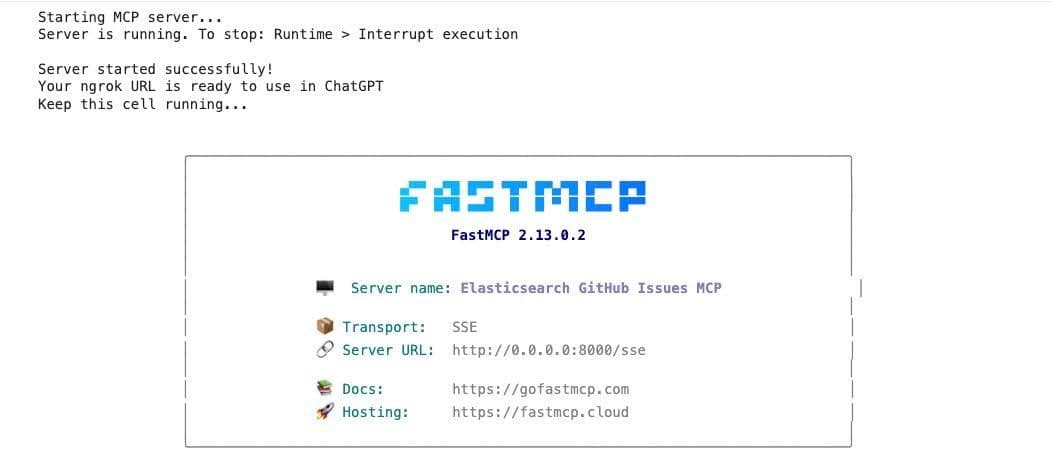
- Wait for the server to start (about 30 seconds)
- Look for the output showing your public ngrok URL
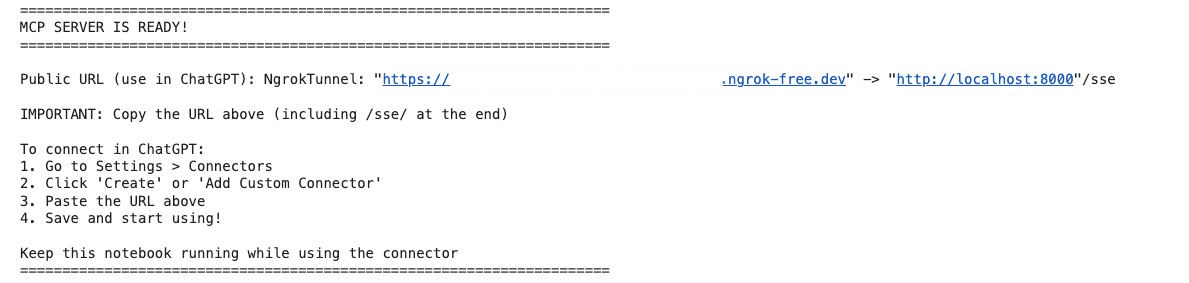
4. The output will show something like:
Connect to ChatGPT
Now we’ll connect the MCP server to your ChatGPT account.
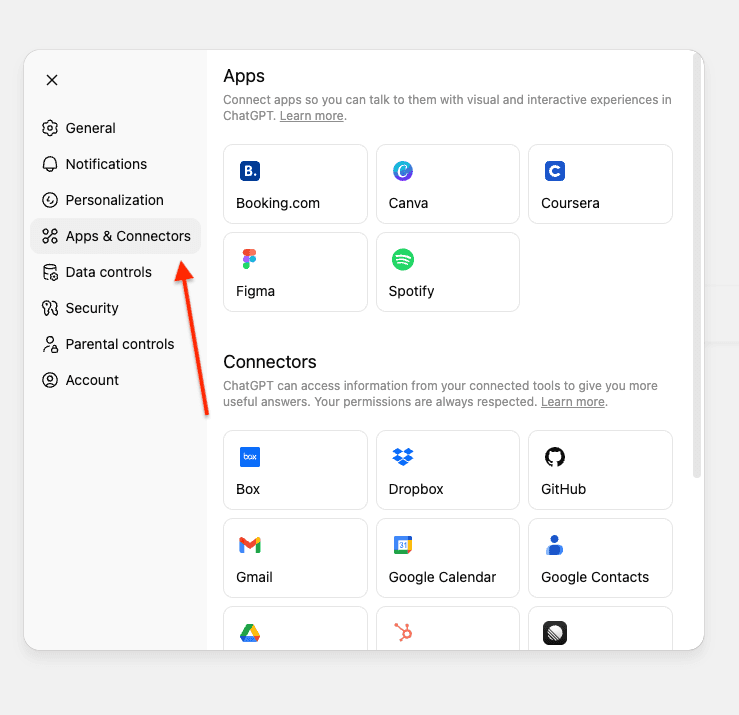
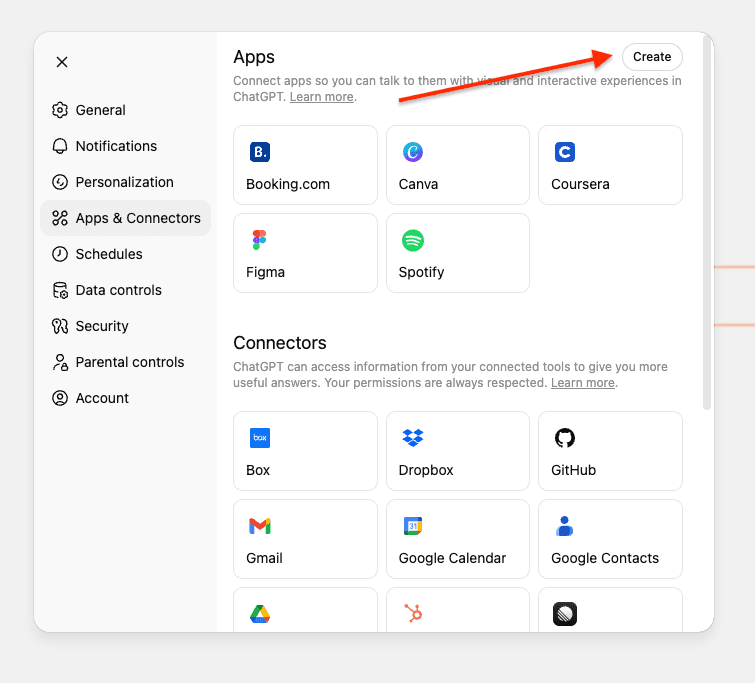
- Open ChatGPT and go to Settings.
- Navigate to Connectors. If you're using a Pro account, you need to turn on developer mode in connectors.
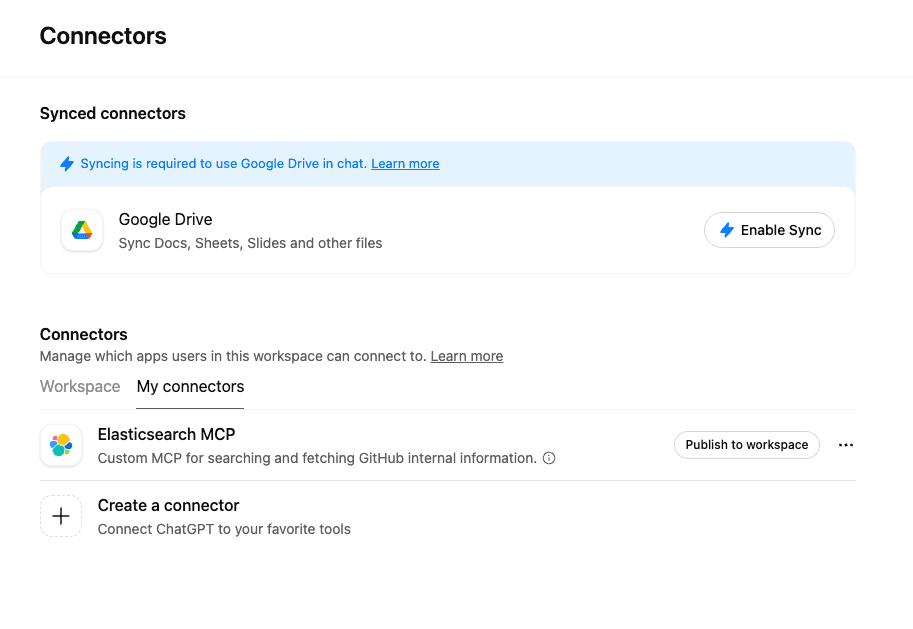
If you're using ChatGPT enterprise or business, you need to publish the connector to your workplace.
3. Click on Create.
Note: In Business, Enterprise, and Edu workspaces, only workspace owners, admins, and users with the respective setting enabled (for Enterprise/Edu) can add custom connectors. Users with a regular member role do not have the ability to add custom connectors themselves.
Once a connector is added and enabled by an owner or admin user, it becomes available for all members of the workspace to use.
4. Enter the required information and your ngrok URL ending in /sse/. Note the “/” after “sse.” It won’t work without it:
- Name: Elasticsearch MCP
- Description: Custom MCP for searching and fetching GitHub internal information.
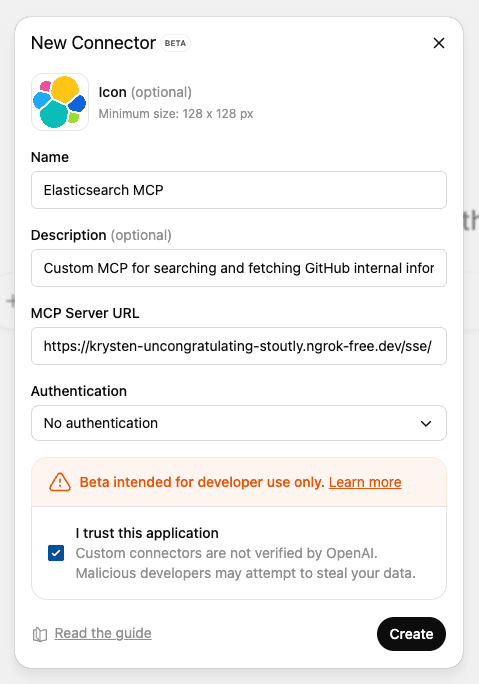
5. Press Create to save the custom MCP.
The connection is instant if your server is running. No additional authentication is needed, as the Elasticsearch API key is configured in your server.
Test the MCP server
Before asking questions, you need to select which connector ChatGPT should use.
Prompt 1: Search for issues
Ask: “Find issues related to Elasticsearch migration” and confirm the actions tool calling.
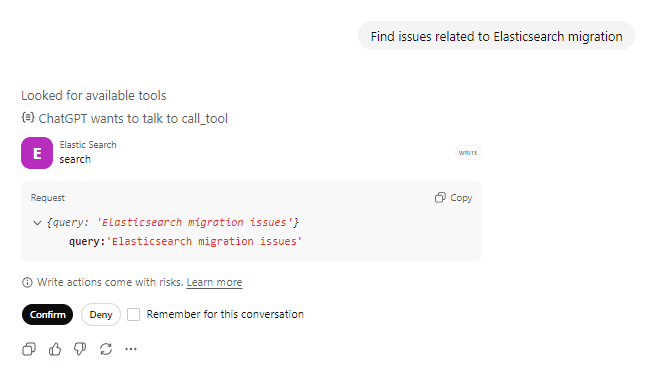
ChatGPT will call the search tool with your query. You can see it’s looking for available tools and preparing to call the Elasticsearch tool and confirms with the user before taking any actions against the tool.
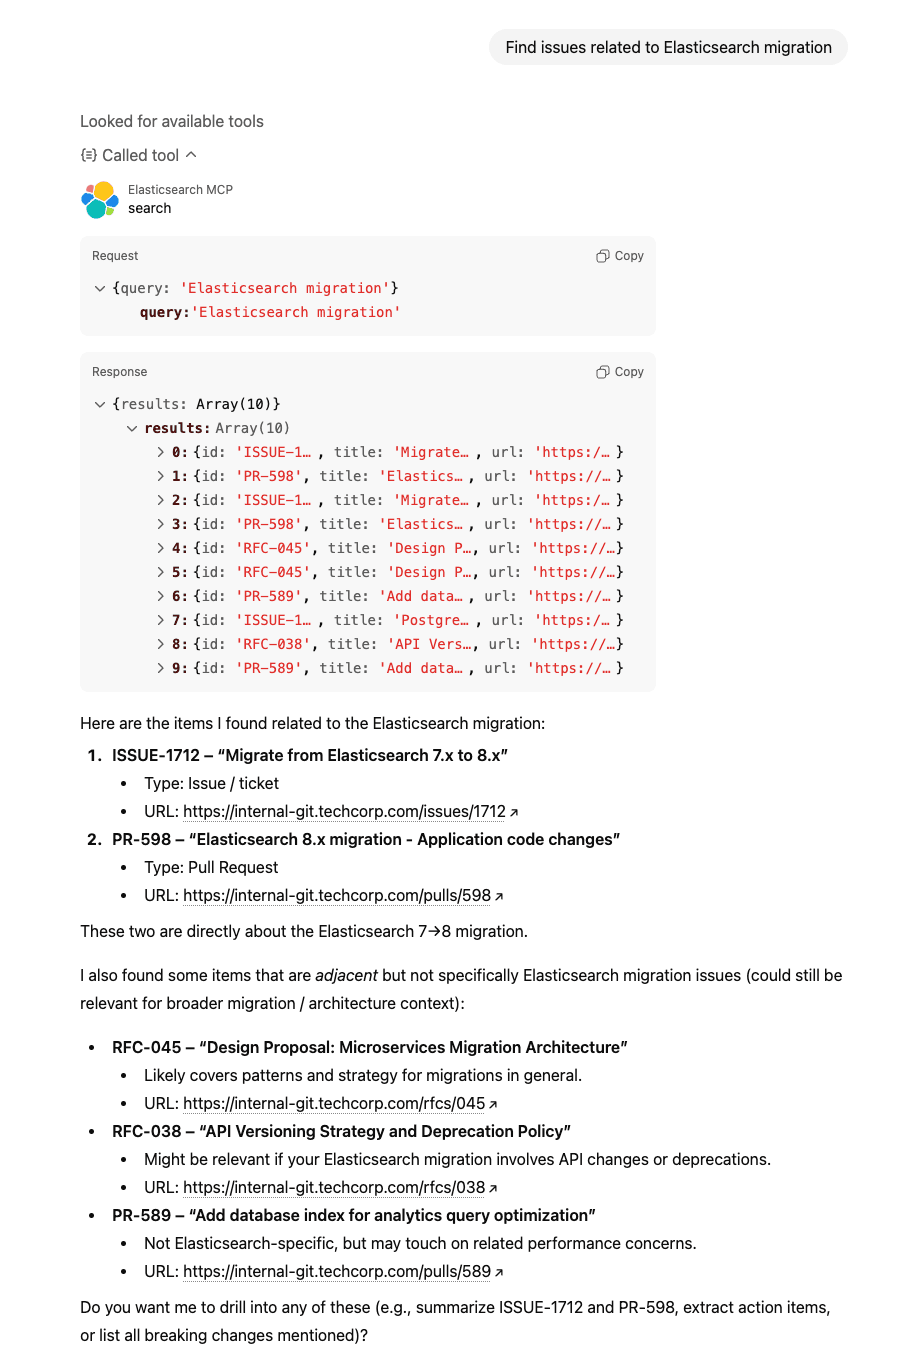
Tool call request:
Tool response:
ChatGPT processes the results and presents them in a natural, conversational format.
Behind the scenes
Prompt: “Find issues related to Elasticsearch migration”
1. ChatGPT calls search(“Elasticsearch migration”)
2. Elasticsearch performs a hybrid search
- Semantic search understands concepts like “upgrade” and “version compatibility.”
- Text search finds exact matches for “Elasticsearch” and “migration.”
- RRF combines and ranks results from both approaches
3. Returns top 10 matching events with id, title, url
4. ChatGPT identifies “ISSUE-1712: migrate from Elasticsearch 7.x to 8.x” as most relevant result
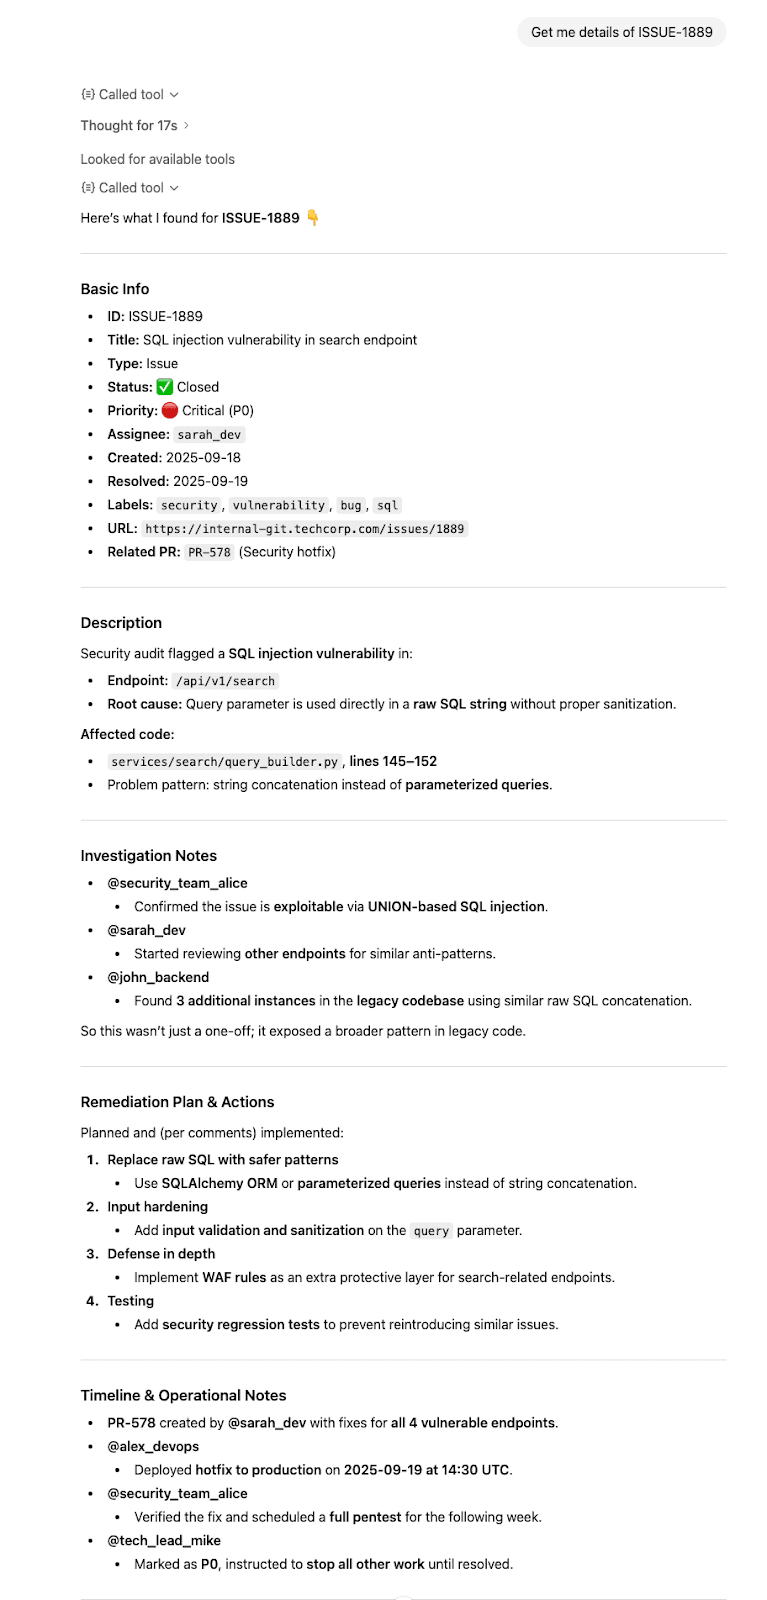
Prompt 2: Get complete details
Ask: “Get me details of ISSUE-1889”
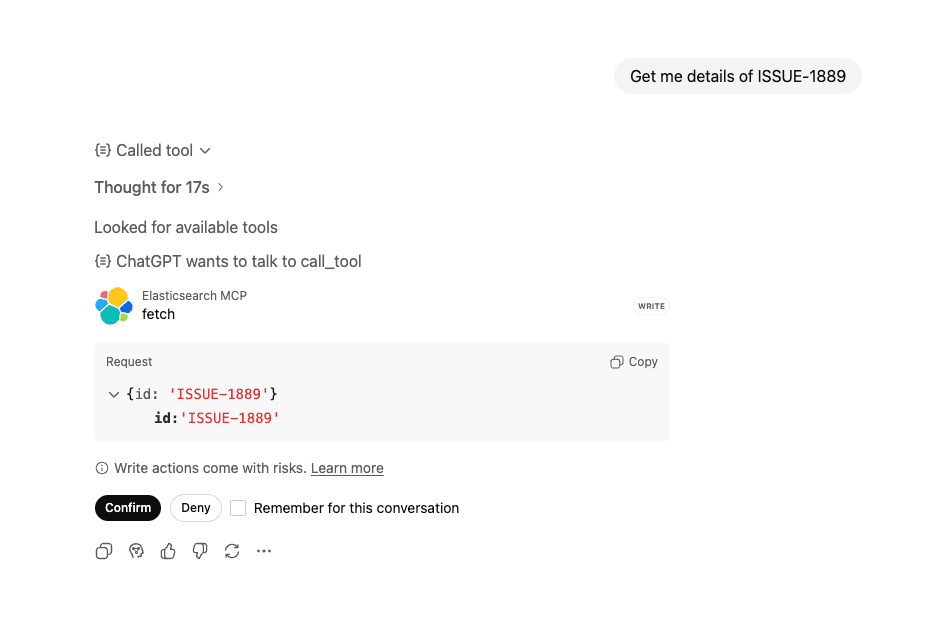
ChatGPT recognizes you want detailed information about a specific issue and calls the fetch tool and confirms with the user before taking any actions against the tool.
Tool call request:
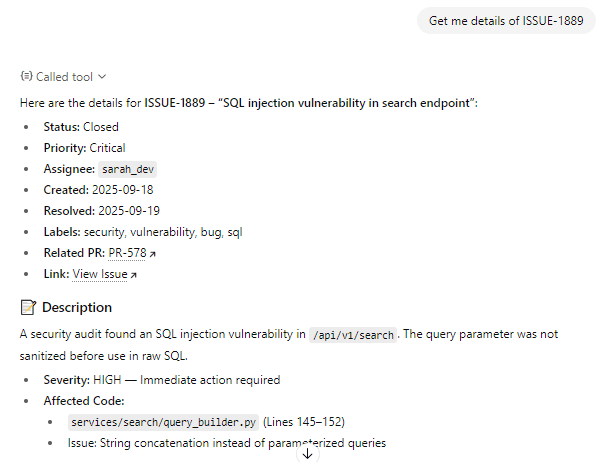
Tool response:
ChatGPT synthesizes the information and presents it clearly.
Behind the scenes
Prompt: “Get me the details of ISSUE-1889”
- ChatGPT calls
fetch(“ISSUE-1889”) - Elasticsearch retrieves the complete document
- Returns a full document with all fields at the root level
- ChatGPT synthesizes the information and responds with proper citations.
Conclusion
In this article, we built a custom MCP server that connects ChatGPT to Elasticsearch using dedicated search and fetch MCP tools, enabling natural language queries over private data.
This MCP pattern works for any Elasticsearch index, documentation, products, logs, or any other data you want to query through natural language.
Related Content
January 30, 2026
Query rewriting strategies for LLMs and search engines to improve results
Exploring query rewriting strategies and explaining how to use the LLM's output to boost the original query's results and maximize search relevance and recall.

January 29, 2026
Building human-in-the-loop (HITL) AI agents with LangGraph and Elasticsearch
Learn what human-in-the-loop (HITL) is and how to build an HITL system with LangGraph and Elasticsearch for a flight system.
January 27, 2026
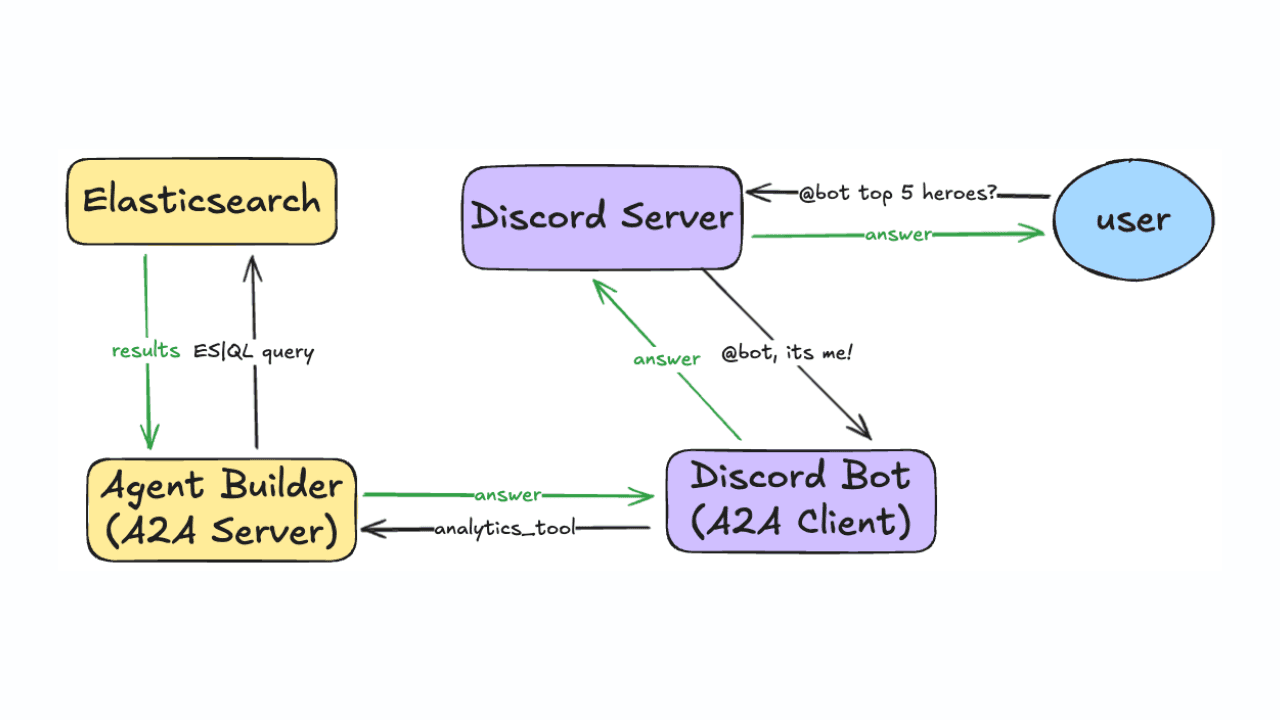
Using Discord and Elastic Agent Builder A2A to build a gaming community support bot
Learn how to connect Discord to Elastic Agent Builder's Agent-to-Agent (A2A) server to create a gaming community support bot.
January 22, 2026
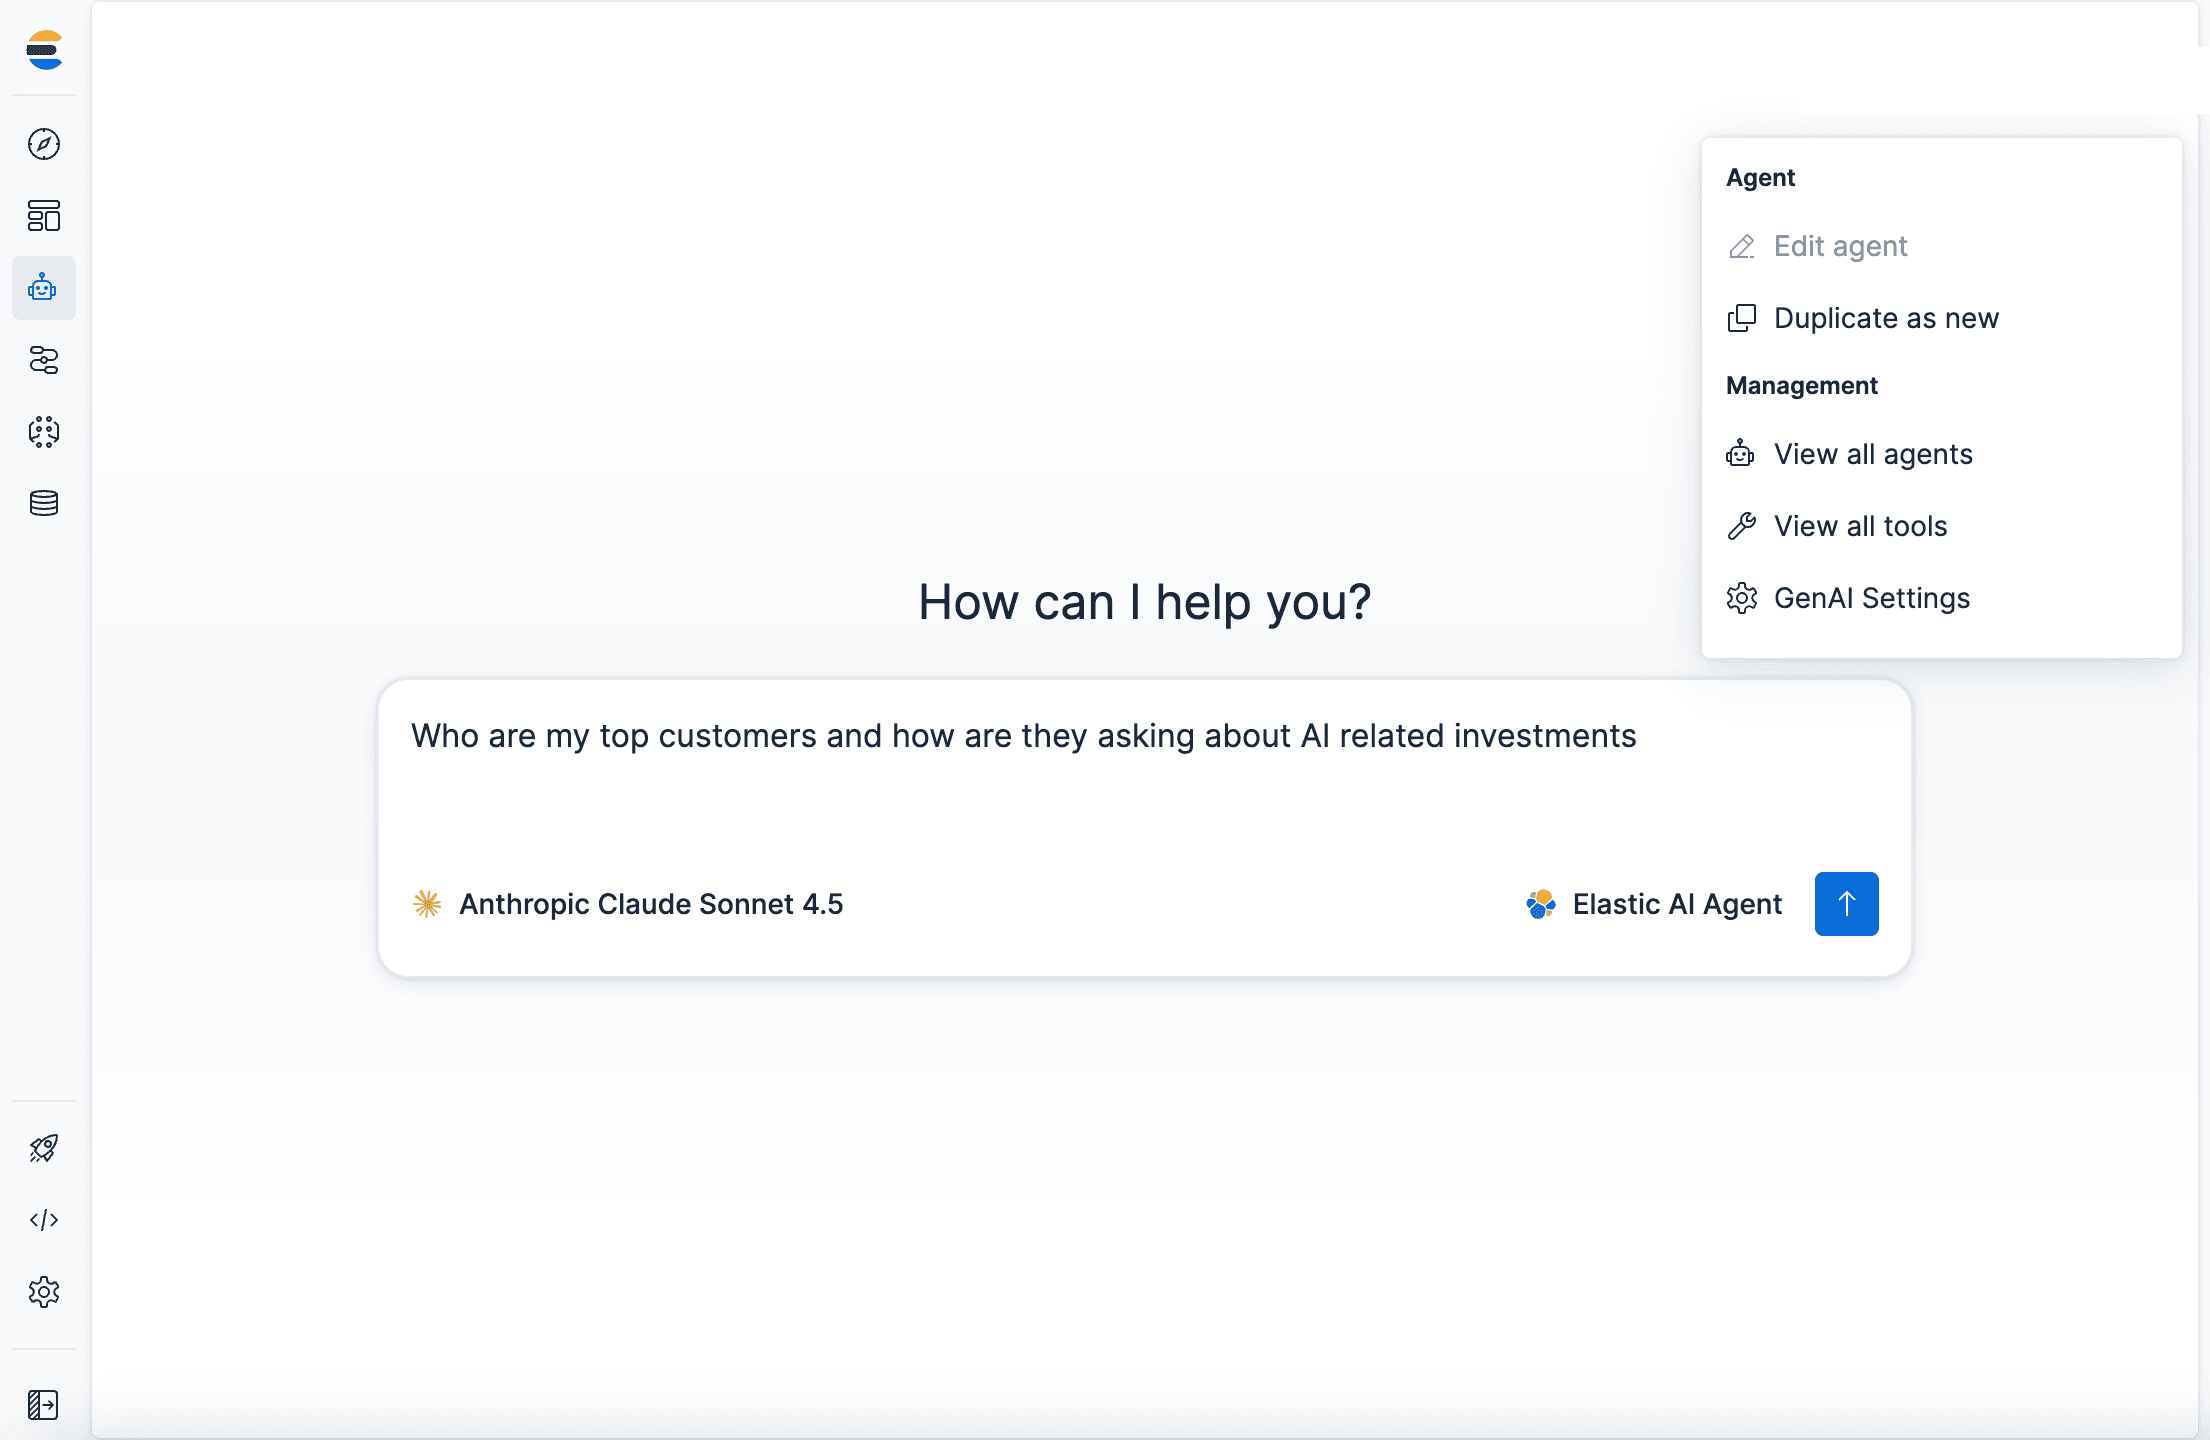
Agent Builder now GA: Ship context-driven agents in minutes
Agent Builder is now GA. Learn how it allows you to quickly develop context-driven AI agents.

January 22, 2026
Building voice agents with Elastic Agent Builder
Exploring how voice agents work and how to build one using Elastic Agent Builder and LiveKit.