Grant access using API keys
editGrant access using API keys
editInstead of using usernames and passwords, you can use API keys to grant
access to Elasticsearch resources. You can set API keys to expire at a certain time,
and you can explicitly invalidate them. Any user with the manage_api_key
or manage_own_api_key cluster privilege can create API keys.
APM Server instances typically send both collected data and monitoring information to Elasticsearch. If you are sending both to the same cluster, you can use the same API key. For different clusters, you need to use an API key per cluster.
For security reasons, we recommend using a unique API key per APM Server instance. You can create as many API keys per user as necessary.
Create an API key for writing events
editIn Kibana, navigate to Stack Management > API keys and click Create API key.
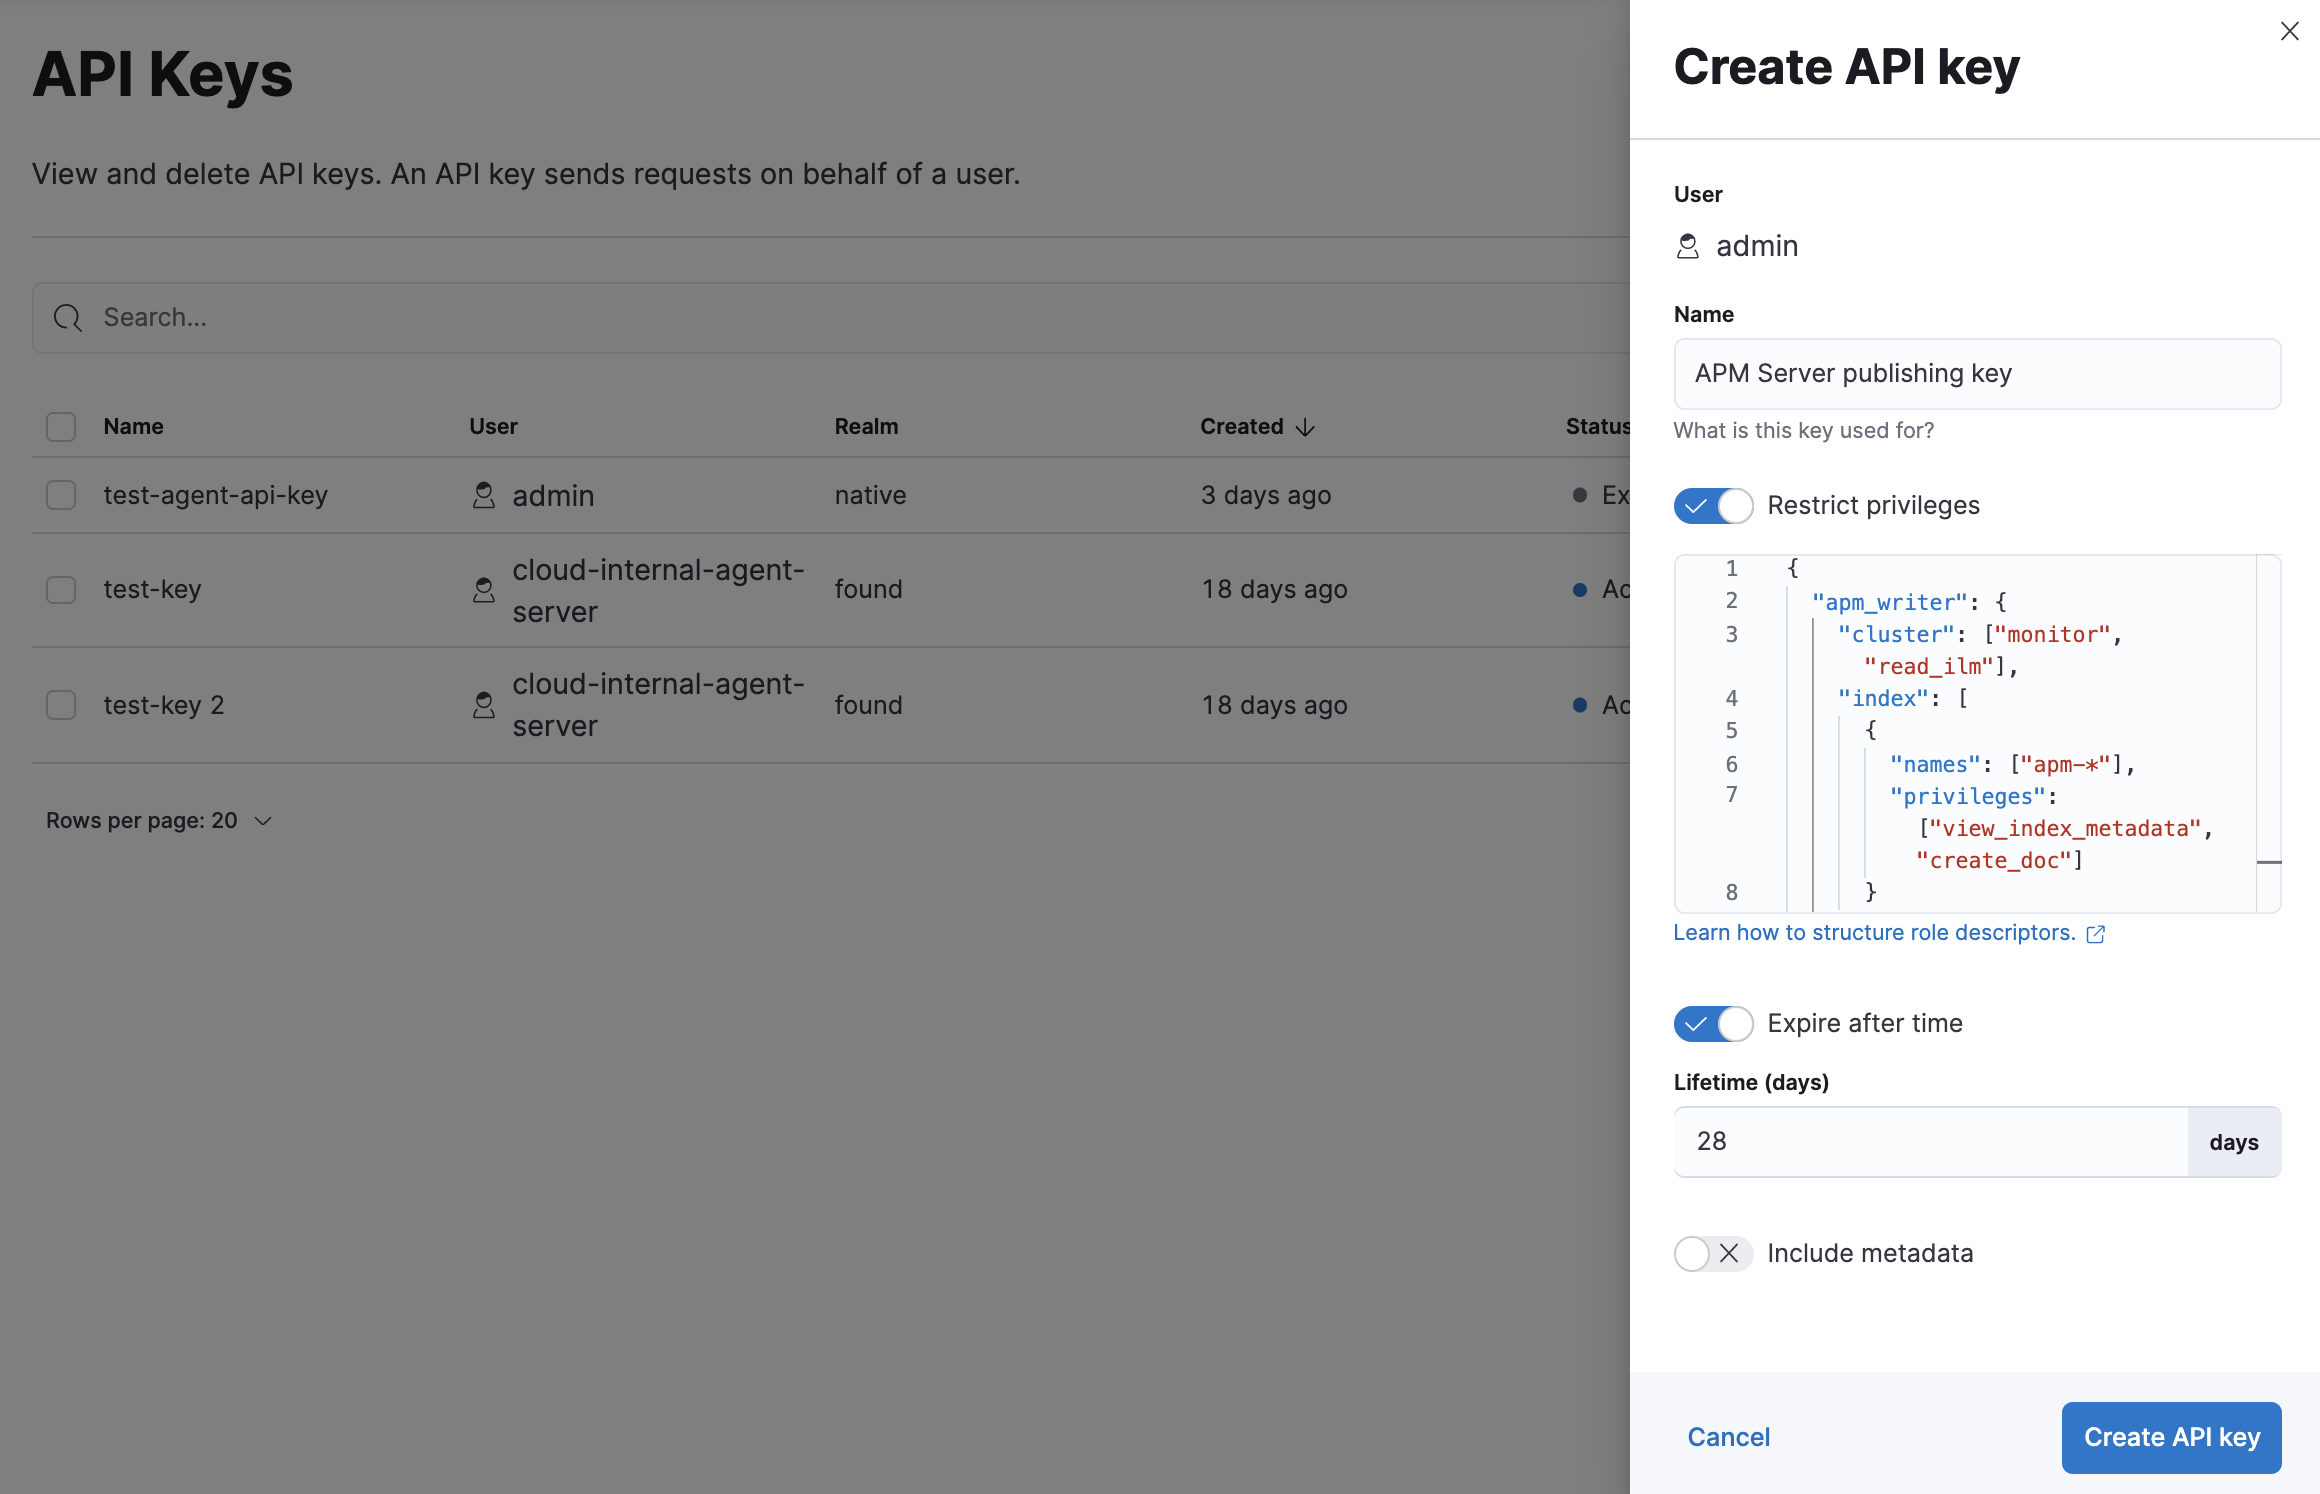
Enter a name for your API key and select Restrict privileges. In the role descriptors box, assign the appropriate privileges to the new API key. For example:
{
    "apm_writer": {
        "cluster": ["monitor"],
        "index": [
            {
                "names": ["traces-apm*","logs-apm*", "metrics-apm*"],
                "privileges": ["auto_configure", "create_doc"]
            }
        ]
    },
    "apm_sourcemap": {
        "index": [
            {
                "names": [".apm-source-map"],
                "privileges": ["read"]
            }
        ]
    },
    "apm_agentcfg": {
        "index": [
            {
                "names": [".apm-agent-configuration"],
                "privileges": ["read"],
                "allow_restricted_indices": true
            }
        ]
    }
}
This example only provides privileges for writing data. See Use feature roles for additional privileges and information.
To set an expiration date for the API key, select Expire after time and input the lifetime of the API key in days.
Click Create API key. In the dropdown, switch to Beats and copy the API key.
You can now use this API key in your apm-server.yml configuration file:
Create an API key for monitoring
editIn Kibana, navigate to Stack Management > API keys and click Create API key.
Enter a name for your API key and select Restrict privileges. In the role descriptors box, assign the appropriate privileges to the new API key. For example:
{
    "apm_monitoring": {
        "index": [
            {
                "names": [".monitoring-beats-*"],
                "privileges": ["create_index", "create_doc"]
            }
      ]
    }
}
This example only provides privileges for publishing monitoring data. See Use feature roles for additional privileges and information.
To set an expiration date for the API key, select Expire after time and input the lifetime of the API key in days.
Click Create API key. In the dropdown, switch to Beats and copy the API key.
You can now use this API key in your apm-server.yml configuration file like this:
Create an API key with Elasticsearch APIs
editYou can also use Elasticsearch’s Create API key API to create a new API key. For example:
POST /_security/api_key
{
  "name": "apm_host001",
  "role_descriptors": {
    "apm_writer": {
      "cluster": ["monitor"],
      "index": [
        {
          "names": ["traces-apm*","logs-apm*", "metrics-apm*"],
          "privileges": ["auto_configure", "create_doc"]
        }
      ]
    },
    "apm_sourcemap": {
      "index": [
        {
          "names": [".apm-source-map"],
          "privileges": ["read"]
        }
      ]
    },
    "apm_agentcfg": {
      "index": [
        {
          "names": [".apm-agent-configuration"],
          "privileges": ["read"],
          "allow_restricted_indices": true
        }
      ]
    }
  }
}
|
Name of the API key |
|
|
Granted privileges, see Use feature roles |
See the Create API key reference for more information.
Learn more about API keys
editSee the Elasticsearch API key documentation for more information: