Troubleshoot node bootlooping in Elastic Cloud Enterprise
ECE
When you attempt to apply a configuration change to a deployment, the attempt may fail with an error indicating that the change could not be applied, and deployment resources may be unable to restart. In some cases, bootlooping may result, where the deployment resources cycle through a continual reboot process.
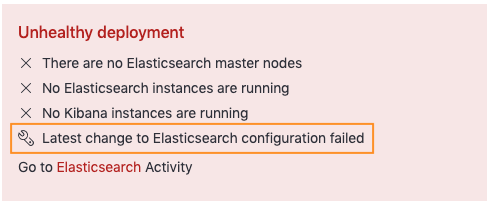
To confirm if your Elasticsearch cluster is bootlooping, you can check the most recent plan under your Deployment Activity page for the error:
Plan change failed: Some instances were unable to start properly.
Here are some frequent causes of a failed configuration change:
If you’re unable to remediate the failing plan’s root cause, you can attempt to reset the deployment to the latest successful Elasticsearch configuration by performing a no-op plan.
The most frequent cause of a failed deployment configuration change is due to invalid or mislocated secure settings. The keystore allows you to safely store sensitive settings, such as passwords, as a key/value pair. You can then access a secret value from a settings file by referencing its key. Importantly, not all settings can be stored in the keystore, and the keystore does not validate the settings that you add. Adding unsupported settings can cause Elasticsearch or other components to fail to restart. To check whether a setting is supported in the keystore, look for a "Secure" qualifier in the lists of reloadable settings.
The following sections detail some secure settings problems that can result in a configuration change error that can prevent a deployment from restarting. You might diagnose these plan failures via the logs or via their related exit codes 1, 3, and 78.
The keystore does not validate any settings that you add, so invalid or outdated values are a common source of errors when you apply a configuration change to a deployment.
To check the current set of stored settings:
- Open the deployment Security page.
- In the Elasticsearch keystore section, check the Security keys list. The list is shown only if you currently have settings configured in the keystore.
One frequent cause of errors is when settings in the keystore are no longer valid, such as when SAML settings are added for a test environment, but the settings are either not carried over or no longer valid in a production environment.
Sometimes, settings added to the keystore to connect to a snapshot repository may not be valid. When this happens, you may get an error such as SettingsException[Neither a secret key nor a shared access token was set.]
For example, when adding an Azure repository storage setting such as azure.client.default.account to the keystore, the associated setting azure.client.default.key must also be added for the configuration to be valid.
When you configure third-party authentication, it’s important that all required configuration elements that are stored in the keystore are included in the Elasticsearch user settings file. For example, when you create a SAML realm, omitting a field such as idp.entity_id when that setting is present in the keystore results in a failed configuration change.
In some cases, settings may accidentally be added to the keystore that should have been added to the Elasticsearch user settings file. It’s always a good idea to check the lists of reloadable settings to determine if a setting can be stored in the keystore. Settings that can safely be added to the keystore are flagged as Secure.
During the process of applying a configuration change, Elastic Cloud checks to determine if any uploaded custom plugins or bundles are expired.
Problematic plugins produce oscillating Elasticsearch start-up logs like the following:
Booting at Sun Sep 4 03:06:43 UTC 2022
Installing user plugins.
Installing elasticsearch-analysis-izumo-master-7.10.2-20210618-28f8a97...
/app/elasticsearch.sh: line 169: [: too many arguments
Booting at Sun Sep 4 03:06:58 UTC 2022
Installing user plugins.
Installing elasticsearch-analysis-izumo-master-7.10.2-20210618-28f8a97...
/app/elasticsearch.sh: line 169: [: too many arguments
Problematic bundles produce similar oscillations but their install log would appear like
2024-11-17 15:18:02 https://found-user-plugins.s3.amazonaws.com/XXXXX/XXXXX.zip?response-content-disposition=attachment%3Bfilename%XXXXX%2F4007535947.zip&x-elastic-extension-version=1574194077471&X-Amz-Algorithm=AWS4-HMAC-SHA256&X-Amz-Date=20241016T133214Z&X-Amz-SignedHeaders=host&X-Amz-Expires=86400&XAmz-Credential=XXXXX%2F20201016%2Fus-east-1%2Fs3%2Faws4_request&X-AmzSignature=XXXXX
Noting in example that the bundle’s expiration X-Amz-Date=20241016T133214Z is before than the log timestamp 2024-11-17 15:18:02 so this bundle is considered expired.
To view any added plugins or bundles:
- Go to the Features page and open the Extensions tab.
- Select any extension and then choose Update extension to renew it. No other changes are needed, and any associated configuration change failures should now be able to succeed.
Configuration change errors can occur when there is insufficient RAM configured for a data tier. In this case, the cluster typically also shows OOM (out of memory) errors. To resolve these, you need to increase the amount of heap memory, which is half of the amount of memory allocated to a cluster. You might also detect OOM in plan changes via their related exit codes 127, 137, and 158.
You can also read our detailed blog Managing and troubleshooting Elasticsearch memory.
In rare cases, when you attempt to upgrade the version of a deployment and the upgrade fails on the first attempt, subsequent attempts to upgrade may fail due to already existing resources. The problem may be due to the system preventing itself from overwriting existing indices, resulting in an error such as this: Another Kibana instance appears to be migrating the index. Waiting for that migration to complete. If no other Kibana instance is attempting migrations, you can get past this message by deleting index .kibana_2 and restarting Kibana.
To resolve this:
Check that you don’t need the content.
Run an Elasticsearch Delete index request to remove the existing index.
In this example, the
.kibana_2index is the rollover of saved objects (such as Kibana visualizations or dashboards) from the original.kibana_1index. Since.kibana_2was created as part of the failed upgrade process, this index does not yet contain any pertinent data and it can safely be deleted.Retry the deployment configuration change.
Configuration change errors can occur when there is insufficient disk space for a data tier. To resolve this, you need to increase the size of that tier to ensure it provides enough storage to accommodate the data in your cluster tier considering the high watermark. For troubleshooting walkthrough, see Fix watermark errors.