- Fleet and Elastic Agent Guide: other versions:
- Fleet and Elastic Agent overview
- Beats and Elastic Agent capabilities
- Quick starts
- Migrate from Beats to Elastic Agent
- Deployment models
- Install Elastic Agents
- Install Fleet-managed Elastic Agents
- Install standalone Elastic Agents
- Install Elastic Agents in a containerized environment
- Run Elastic Agent in a container
- Run Elastic Agent on Kubernetes managed by Fleet
- Install Elastic Agent on Kubernetes using Helm
- Example: Install standalone Elastic Agent on Kubernetes using Helm
- Example: Install Fleet-managed Elastic Agent on Kubernetes using Helm
- Advanced Elastic Agent configuration managed by Fleet
- Configuring Kubernetes metadata enrichment on Elastic Agent
- Run Elastic Agent on GKE managed by Fleet
- Run Elastic Agent on Amazon EKS managed by Fleet
- Run Elastic Agent on Azure AKS managed by Fleet
- Run Elastic Agent Standalone on Kubernetes
- Scaling Elastic Agent on Kubernetes
- Using a custom ingest pipeline with the Kubernetes Integration
- Environment variables
- Run Elastic Agent as an OTel Collector
- Run Elastic Agent without administrative privileges
- Install Elastic Agent from an MSI package
- Installation layout
- Air-gapped environments
- Using a proxy server with Elastic Agent and Fleet
- Uninstall Elastic Agents from edge hosts
- Start and stop Elastic Agents on edge hosts
- Elastic Agent configuration encryption
- Secure connections
- Manage Elastic Agents in Fleet
- Configure standalone Elastic Agents
- Create a standalone Elastic Agent policy
- Structure of a config file
- Inputs
- Providers
- Outputs
- SSL/TLS
- Logging
- Feature flags
- Agent download
- Config file examples
- Grant standalone Elastic Agents access to Elasticsearch
- Example: Use standalone Elastic Agent with Elastic Cloud Serverless to monitor nginx
- Example: Use standalone Elastic Agent with Elasticsearch Service to monitor nginx
- Debug standalone Elastic Agents
- Kubernetes autodiscovery with Elastic Agent
- Monitoring
- Reference YAML
- Manage integrations
- Package signatures
- Add an integration to an Elastic Agent policy
- View integration policies
- Edit or delete an integration policy
- Install and uninstall integration assets
- View integration assets
- Set integration-level outputs
- Upgrade an integration
- Managed integrations content
- Best practices for integrations assets
- Data streams
- Define processors
- Processor syntax
- add_cloud_metadata
- add_cloudfoundry_metadata
- add_docker_metadata
- add_fields
- add_host_metadata
- add_id
- add_kubernetes_metadata
- add_labels
- add_locale
- add_network_direction
- add_nomad_metadata
- add_observer_metadata
- add_process_metadata
- add_tags
- community_id
- convert
- copy_fields
- decode_base64_field
- decode_cef
- decode_csv_fields
- decode_duration
- decode_json_fields
- decode_xml
- decode_xml_wineventlog
- decompress_gzip_field
- detect_mime_type
- dissect
- dns
- drop_event
- drop_fields
- extract_array
- fingerprint
- include_fields
- move_fields
- parse_aws_vpc_flow_log
- rate_limit
- registered_domain
- rename
- replace
- script
- syslog
- timestamp
- translate_sid
- truncate_fields
- urldecode
- Command reference
- Troubleshoot
- Release notes
Monitor a self-managed Fleet Server
editMonitor a self-managed Fleet Server
editFor self-managed Fleet Servers, monitoring is key because the operation of the Fleet Server is paramount to the health of the deployed agents and the services they offer. When Fleet Server is not operating correctly, it may lead to delayed check-ins, status information, and updates for the agents it manages. The monitoring data will tell you when to add capacity for Fleet Server, and provide error logs and information to troubleshoot other issues.
For self-managed clusters, monitoring is on by default when you create a new agent policy or use the existing Default Fleet Server agent policy.
To monitor Fleet Server:
- In Fleet, open the Agent policies tab.
- Click the Fleet Server policy name to edit the policy.
- Click the Settings tab and verify that Collect agent logs and Collect agent metrics are selected.
-
Next, set the Default namespace to something like
fleetserver
.Setting the default namespace lets you segregate Fleet Server monitoring data from other collected data. This makes it easier to search and visualize the monitoring data.
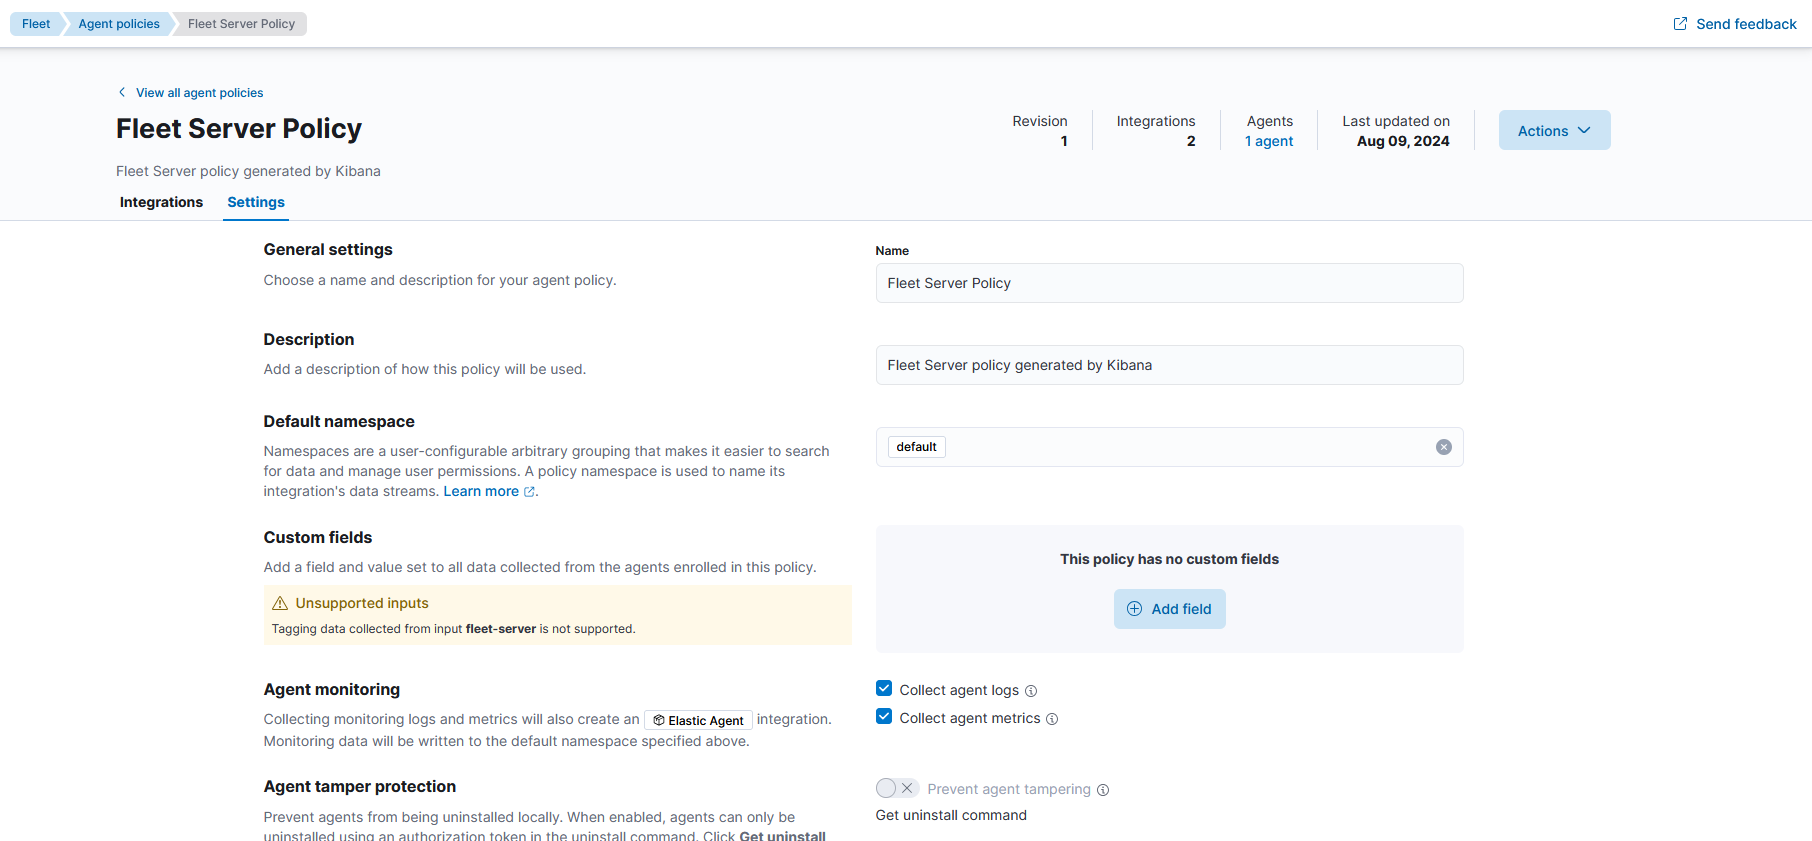
- To confirm your change, click Save changes.
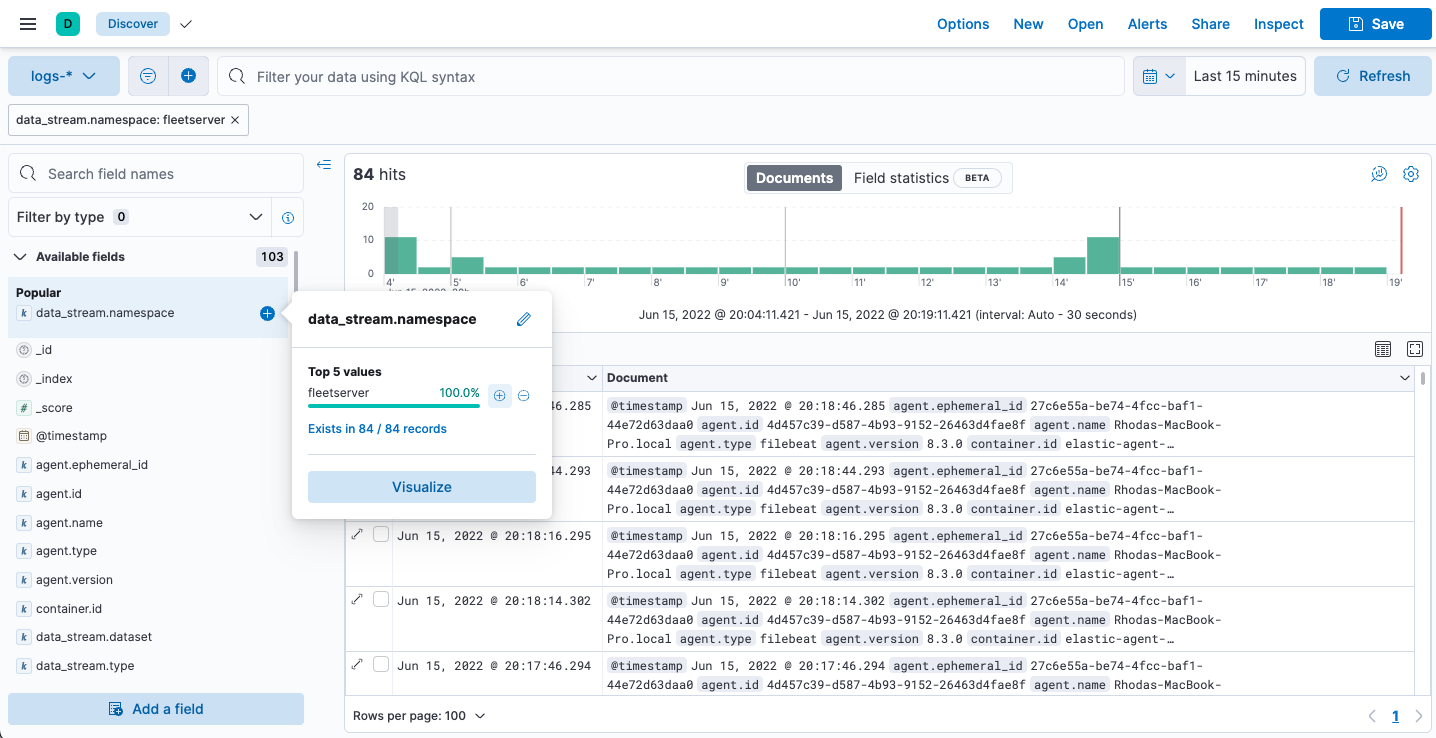
To see the metrics collected for the agent running Fleet Server, go to Analytics > Discover.
In the following example, fleetserver
was configured as the namespace, and
you can see the metrics collected:
Go to Analytics > Dashboard and search for the predefined dashboard called
[Elastic Agent] Agent metrics. Choose this dashboard, and run a query based
on the fleetserver
namespace.
The following dashboard shows data for the query data_stream.namespace:
"fleetserver"
. In this example, you can observe CPU and memory usage as a
metric and then resize the Fleet Server, if necessary.
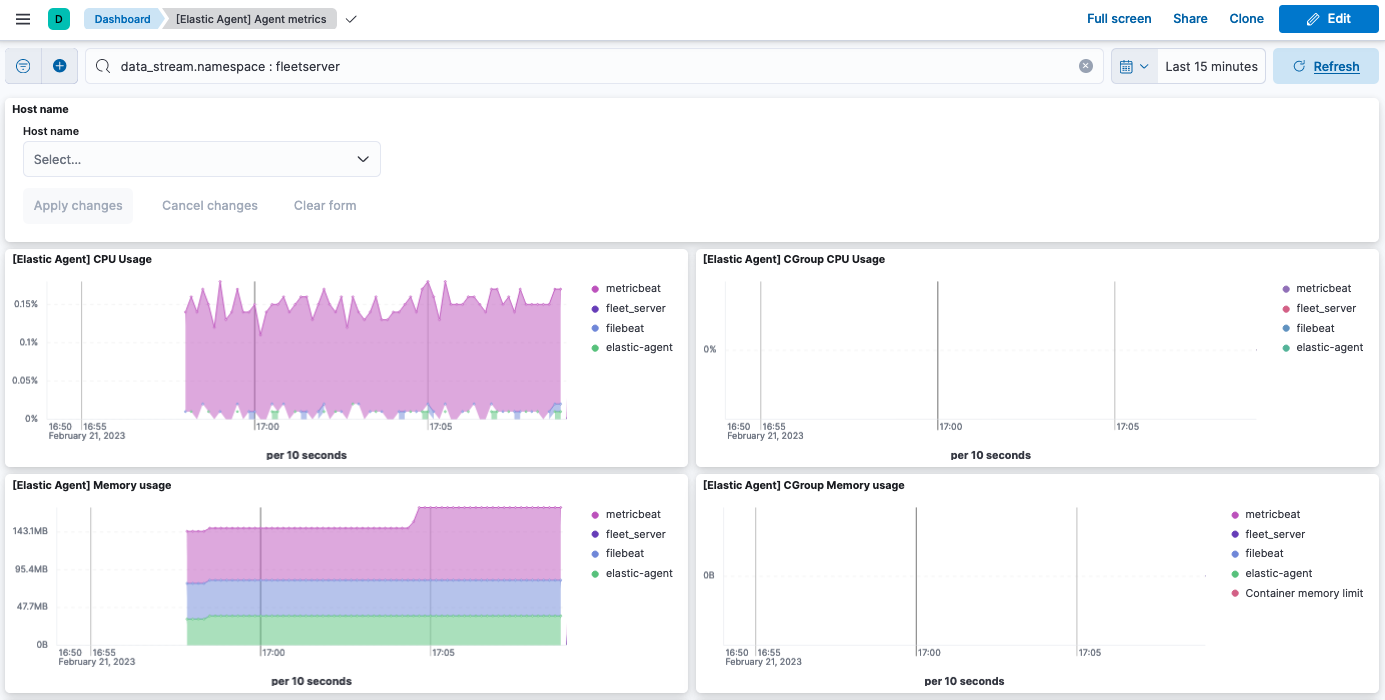
Note that as an alternative to running the query, you can hide all metrics
except fleet_server
in the dashboard.